
The data tables and Bootstrap
In the table tutorial of Bootstrap, I showed how you can create simple tables by using Bootstrap built-in classes. In this tutorial, a plug-in is used for creating data tables that have useful features like pagination, sorting, search, etc.
Features
- A user may select how many rows to display at a time by selecting from the dropdown e.g. 10, 25, 50, or 100 rows.
- The table rows can be sorted by clicking on the column headers.
- It has a pagination feature as well, so if a user selects 10 rows and the table has 50 rows, the arrows will be displayed for moving next or previous.
- It has a search facility as well. Just enter a search term and table rows will be filtered on the fly.
- At the bottom, a total count of the rows along with current numbers is also displayed.
See the following examples to learn more about it.
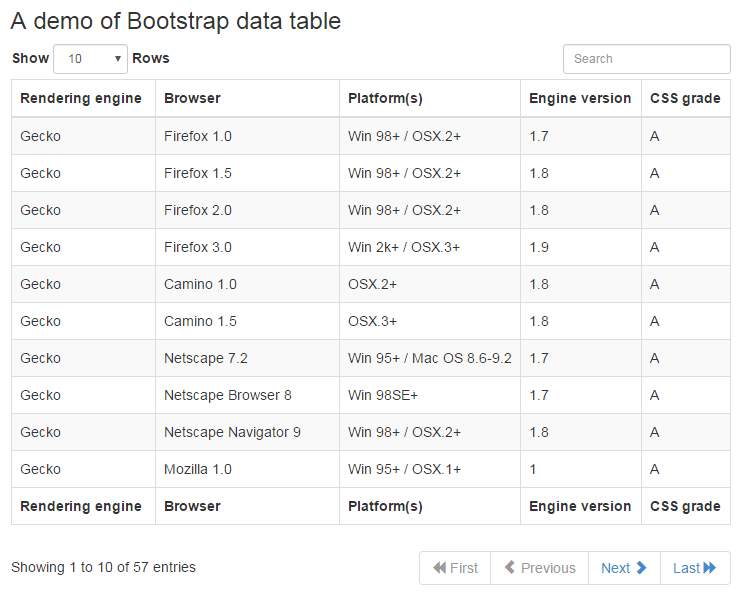
A demo of datatable with pagination and search options
In this example, a Bootstrap data table is created with a few options like showing 10 rows initially, search, sorting option and pagination. The pagination allows moving first, last, next and previous pages. For showing “page” numbers along with these options, see next example:
See online demo and code
Setting up the data table plug-in
This is how the Bootstrap datatable plug-in is set up.
First of all, you need to include the Bootstrap and plug-in’s CSS file in the <head> section (See the download link in credit section at the bottom):
<link rel=”stylesheet” href=”//netdna.bootstrapcdn.com/bootstrap/3.0.0/css/bootstrap.min.css”>
<link rel=”stylesheet” href=”css/datatables/datatables.css”>
Place it at the desired location.
Secondly, just above the </body> tag, place jQuery library, Bootstrap JS file, jquery.dataTables.min.js file, and this plug-in JS file:
<script src=”//ajax.googleapis.com/ajax/libs/jquery/1.10.2/jquery.min.js”></script>
<script src=”//netdna.bootstrapcdn.com/bootstrap/3.0.0/js/bootstrap.min.js”></script>
<script src=”//cdnjs.cloudflare.com/ajax/libs/datatables/1.9.4/jquery.dataTables.min.js”></script>
<script src=”js/datatables/datatables.js”></script>
The reason why you need including the dataTables JS file is this plug-in uses dataTable underneath for a few features.
In the markup section, create the HTML table tag with fewer classes like datatable, table table-striped etc which is followed by creating the table headers and data.
In the <script> section, you may specify certain options like showing the paging with page numbers or just four or two buttons, searching etc. In this example, the four button option is set:
"sPaginationType": "bs_four_button"
See the complete code on the demo page.
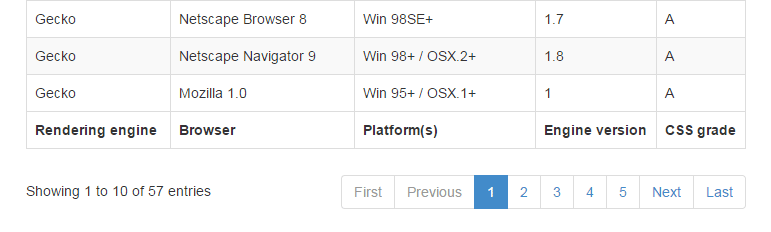
A demo of page numbers
In this example, only a single option is modified as compared to the above example i.e.:
"sPaginationType": "bs_full"
This is used in the jQuery code. The purpose is to display the page numbers along with move next, previous, first, or last.
Output:
A demo of showing next, previous and numbers in datatable Bootstrap
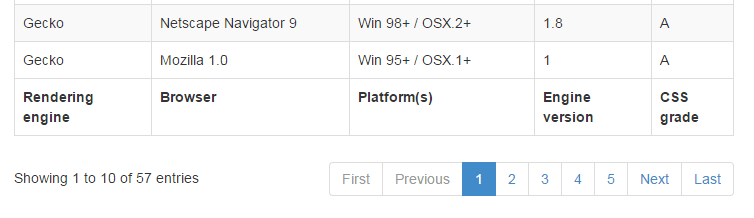
You may also omit the first and last options by using the “sPaginationType”: “bs_normal” in the jQuery code. That is, replace the bs_full by bs_normal value:
Use this script before the </body> tag:
		<script type="text/javascript">
		$(document).ready(function() {
			$('.datatable').dataTable({
				"sPaginationType": "bs_normal"
			});
			$('.datatable').each(function(){
				var datatable = $(this);
				// SEARCH - Add the placeholder for Search and Turn this into in-line form control
				var search_input = datatable.closest('.dataTables_wrapper').find('div[id$=_filter] input');
				search_input.attr('placeholder', 'Search');
				search_input.addClass('form-control input-sm');
				// LENGTH - Inline-Form control
				var length_sel = datatable.closest('.dataTables_wrapper').find('div[id$=_length] select');
				length_sel.addClass('form-control input-sm');
			});
		});
		</script>
You can see, the buttons are only for page numbers and for moving next or previous.
Note: Don’t forget to include jQuery and plug-in JS files as shown in the above demos.
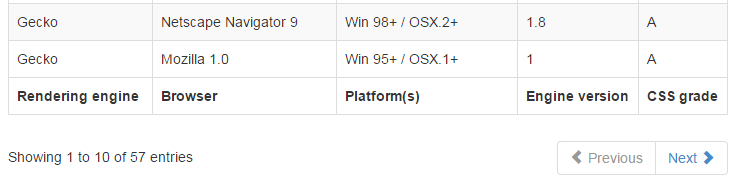
Finally, you may only display the Next and Previous buttons as well. This can be done by using the
“sPaginationType”: “bs_two_button“
option in the jQuery code.
Sample Output:
A demo of changing the color of every other row
Want to add some colors in tables along with useful features? No problem, you just need to change or add a few CSS properties in the existing CSS file or in the <style> section.
In this demo, the color of every other row is changed to Bootstrap’s standard success class i.e. green.
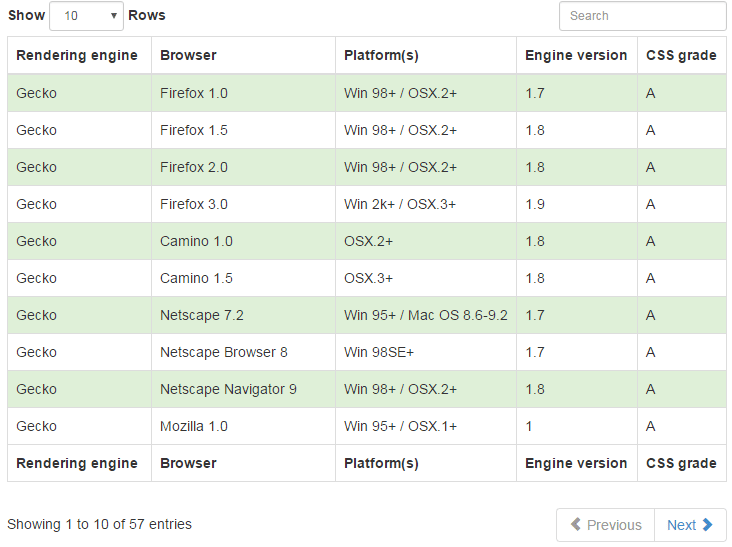
For that, I just added background color for each odd row in the <style> section using the .table-striped class which is specified in the <table> tag:
.table-striped tbody tr:nth-child(odd) td,

.table-striped tbody tr:nth-child(odd) th {

background-color: #DFF0D8;
Changing color of even rows in Bootstrap datatable
Not only odd rows color can be changed, but you may specify different colors for both odd and even rows. For that simply use the even in :nth-child.
Have a look at this demo and code where odd rows are given light red, the standard danger color of Bootstrap and even rows are given dark red color. Also, as it is dark colored, I changed the text color to white so that text is visible clearly:
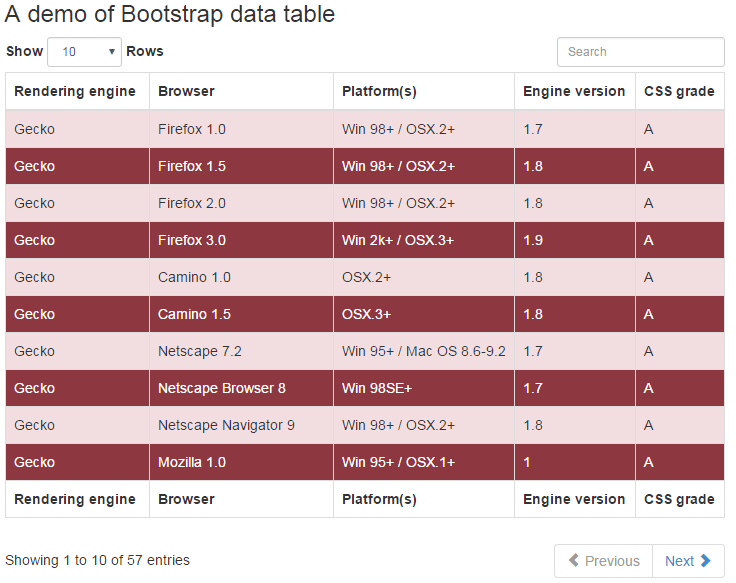
The following CSS is used in the <style> section for even and odd rows:
.table-striped tbody tr:nth-child(odd) td,

.table-striped tbody tr:nth-child(odd) th {

background-color: #F2DEE0;

}


.table-striped tbody tr:nth-child(even) td,

.table-striped tbody tr:nth-child(even) th {

background-color: #8D3841;

color:#fff;

}
Credit for this jQuery data table plug-in: Developer at GitHub website