
For example, the default behavior of a link as the mouse hovers over it is the hand cursor.
Syntax for using the cursor property
The following values can be used for the cursor property:
- Default
- None
- Pointer
- Crosshair
- Copy
- Move
- Text
- vertical-text
- e-resize
- n-resize
- ne-resize
- nw-resize
- s-resize
- se-resize
- sw-resize
- w-resize
- ew-resize
- ns-resize
- nesw-resize
- nwse-resize
- col-resize
- row-resize
- context-menu
- help
- progress
- wait
- zoom-in
- zoom-out
- no-drop
- alias
- cell
- not-allowed
- all-scroll
- grab
- grabby
- auto
in the next section, we will see the usage of these values in different elements. I will also show, how to customize the CSS pointer value.
An example of cursor property with various values
See the example code and output by clicking the image or link below where you can see almost all cursor values. Just bring the mouse over the respective text and you will see the icon accordingly.
See online demo and code
<!DOCTYPE html>
<html>
<head>
<style>
#p1 {cursor: pointer;}
#p2 {cursor: crosshair;}
#p3 {cursor: copy;}
#p4 {cursor: move;}
#p5 {cursor: text;}
#p6 {cursor: vertical-text;}
#p7 {cursor: e-resize;}
#p8 {cursor: n-resize;}
#p9 {cursor: ne-resize;}
#p10 {cursor: nw-resize;}
#p11{cursor: s-resize;}
#p12 {cursor: se-resize;}
#p13 {cursor: sw-resize;}
#p14 {cursor: w-resize;}
#p15 {cursor: ew-resize;}
#p16 {cursor: ns-resize;}
#p17 {cursor: nesw-resize;}
#p18 {cursor: nwse-resize;}
#p19 {cursor: col-resize;}
#p20 {cursor: row-resize;}
#p21 {cursor: context-menu;}
#p22 {cursor: help;}
#p23 {cursor: progress;}
#p24 {cursor: wait;}
#p25 {cursor: zoom-in;}
#p26 {cursor: zoom-out;}
#p27 {cursor: no-drop;}
#p28 {cursor: alias;}
#p29 {cursor: cell;}
#p30 {cursor: not-allowed;}
#p31 {cursor: all-scroll;}
#p32 {cursor: grab;}
#p33 {cursor: grabby;}
#p34 {cursor: auto;}
</style>
</head>
<body>
<p>The example of cursor property</p>
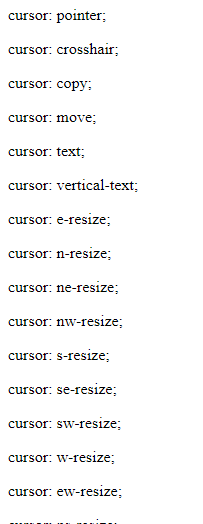
<p id="p1">cursor: pointer;</p>
<p id="p2">cursor: crosshair;</p>
<p id="p3">cursor: copy;</p>
<p id="p4">cursor: move;</p>
<p id="p5">cursor: text;</p>
<p id="p6">cursor: vertical-text;</p>
<p id="p7">cursor: e-resize;</p>
<p id="p8">cursor: n-resize;</p>
<p id="p9">cursor: ne-resize;</p>
<p id="p10">cursor: nw-resize;</p>
<p id="p11">cursor: s-resize;</p>
<p id="p12">cursor: se-resize;</p>
<p id="p13">cursor: sw-resize;</p>
<p id="p14">cursor: w-resize;</p>
<p id="p15">cursor: ew-resize;</p>
<p id="p16">cursor: ns-resize;</p>
<p id="p17">cursor: nesw-resize;</p>
<p id="p18">cursor: nwse-resize;</p>
<p id="p19">cursor: col-resize;</p>
<p id="p20">cursor: row-resize;</p>
<p id="p21">cursor: context-menu;</p>
<p id="p22">cursor: help;</p>
<p id="p23">cursor: progress;</p>
<p id="p24">cursor: wait;</p>
<p id="p25">cursor: zoom-in;</p>
<p id="p26">cursor: zoom-out;</p>
<p id="p27">cursor: no-drop;</p>
<p id="p28">cursor: alias;</p>
<p id="p29">cursor: cell;</p>
<p id="p30">cursor: not-allowed;</p>
<p id="p31">cursor: all-scroll;</p>
<p id="p32">cursor: grab;</p>
<p id="p33">cursor: grabby;</p>
<p id="p34">cursor: auto;</p>
</body>
</html>
The example of CSS pointer default replacement
Sometimes you may need to use your own custom pointer or another cursor type to reflect the theme of your website.
In that case, you may replace the default pointer with your own cursor by specifying the URL() in the cursor property.
In the example below, the pointer cursor is replaced by a custom image. Bring the mouse over the demo text and a custom pointer appears:
<html>

<head>

<style>


#p1 {

cursor: URL(images/pointer-cursor-1.png), pointer;

}


</style>

</head>

<body>

<p>Custom pointer example</p>

<p id="p1">cursor: URL(images/pointer-cursor-1.png), pointer;</p>

</body>

</html>
Using font-awesome as custom CSS cursor
All we know is that font-awesome is a powerful and beautiful font/icon library that you may use in different elements of your website. For example, using the icons in buttons, navigation bars, tables, etc. is made easier by using this library.
What about using font awesome icons as the custom CSS cursor? How to do it?
Well, we probably don’t have a way to use these icons straight-forward as the cursor in CSS like replacing the default pointer, etc.
One of the ways is to download a specific font/icon and create an image (.png, .cur), etc., and then use that icon as shown in the above demo.
The other way of using those icons is a third-party plug-in and its demo/usage is shown below.
The example of font awesome pointer
In this example, one line of code is used for the pointer icon from the font-awesome library.
<!DOCTYPE html>

<html>

<head>

<link rel="stylesheet" href="https://maxcdn.bootstrapcdn.com/font-awesome/4.4.0/css/font-awesome.min.css">

<script src="https://ajax.googleapis.com/ajax/libs/jquery/3.2.1/jquery.min.js"></script>

<script src="https://cdn.rawgit.com/jwarby/jquery-awesome-cursor/master/dist/jquery.awesome-cursor.min.js"></script></pre>


</head>

<body>

<h2>A demo of CSS pointer cursor with font awesome</h2>

<p id="p1">Bring cursor over this text to see font awesome cursor</p>


<script>

  $('#p1').awesomeCursor('mouse-pointer');

</script>

</body>

</html>
The example of using all plug-in options
By using this cool plug-in for the custom cursor, you may set the size, color, and rotation of the cursor as well.
<!DOCTYPE html>

<html>

<head>

<link rel="stylesheet" href="https://maxcdn.bootstrapcdn.com/font-awesome/4.4.0/css/font-awesome.min.css">

<script src="https://ajax.googleapis.com/ajax/libs/jquery/3.2.1/jquery.min.js"></script>

<script src="https://cdn.rawgit.com/jwarby/jquery-awesome-cursor/master/dist/jquery.awesome-cursor.min.js"></script></pre>


</head>

<body>

<h2>A demo of pointer with other properties</h2>


<p id="p1">Bring cursor over this text to see font awesome cursor</p>


<script>

$('#p1')

  .awesomeCursor('pencil', {

    color: 'red',

    size: 32,

    rotate: 60

  });

</script>

</body>

</html>
How to set up jQuery Awesome Cursor plug-in
By using the above example codes from the demo pages, you can see the CDN links for all required files.
You need to add three links in the head section of the web page:
<link rel=”stylesheet” href=”https://maxcdn.bootstrapcdn.com/font-awesome/4.4.0/css/font-awesome.min.css”>
<script src=”https://ajax.googleapis.com/ajax/libs/jquery/3.2.1/jquery.min.js”></script>
<script src=”https://cdn.rawgit.com/jwarby/jquery-awesome-cursor/master/dist/jquery.awesome-cursor.min.js”></script>
This is followed by writing the code in the <script> section for specifying the icon and setting the options like color, size, and rotation.
For more options for adding the plug-in (bower, npm, etc.), visit the plug-in page below.
Credit: jquery-awesome-cursor