Creating single line textbox in Python using tkinter library
To enable users to enter single-line text in Python GUI based application, you may use the tkinter entry widget.
- The entry widget allows single-line text.
- For multiple line text entry, use the text widget.
- A user can enter numbers, strings, and mixed text as using the entry widget of tkinter library.
Syntax of creating an entry widget
w = Entry (parent, options)
Let us show you examples of creating single line textbox with simple and different available options.
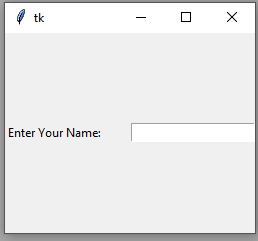
An example of simple entry widget
In this example, we will create a label that is attached with the Entry widget. As you run the program, you will see:
Enter your name:
With the entry widget/textbox:
from tkinter import *

win = Tk()

win.geometry("250x200")

#Label for textbox

Lbl = Label(win, text="Enter Your Name:")

Lbl.pack( side = LEFT)


#Creating a textbox/entry

Ent = Entry(win)

Ent.pack(side = RIGHT)


win.mainloop()
Output:
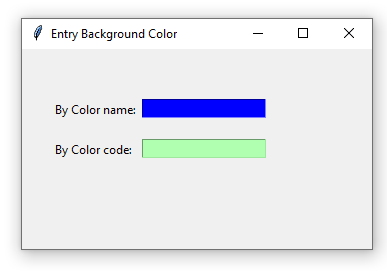
Setting the background color of entry box
By using bg option of the entry widget, you may set the background color of the textbox.
You may provide a color name e.g. green, blue, red, etc., or a color value e.g. #FFF000.
See the example below.
Code:
#Entry fields background colors

from tkinter import *


win = Tk()


win.geometry("350x200")

win.title("Entry Background Color")


lbl1 = Label(win, text = "By Color name:").place(x = 30,y = 50)

lbl2 = Label(win, text = "By Color code:").place(x = 30, y = 90)


txt1 = Entry(win, bg="blue").place(x = 120, y = 50)

txt2 = Entry(win, bg="#B0FFB0").place(x = 120, y = 90)


win.mainloop()
Output:
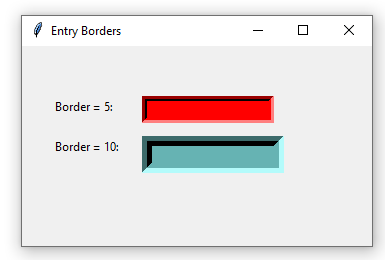
Setting borders of text box by bd option
The bd option enables us to set the borders of the Entry textbox. The default value is 2.
In the example below, we will set the border of two entry widgets. The first is 5 px and the second is 10 pixels for the demo only.
Python code:
#Entry fields Border

from tkinter import *

win = Tk()


win.geometry("350x200")

win.title("Entry Borders")


lbl1 = Label(win, text = "Border = 5:").place(x = 30,y = 50)

lbl2 = Label(win, text = "Border = 10:").place(x = 30, y = 90)


txt1 = Entry(win, bg="red", bd="5").place(x = 120, y = 50)

txt2 = Entry(win, bg="#66B3B3", bd="10").place(x = 120, y = 90)


win.mainloop()
Output:
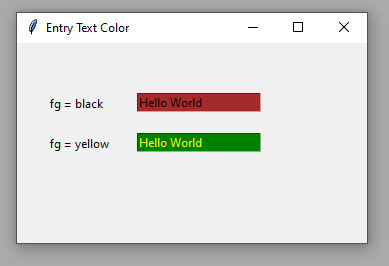
An example of foreground color/text color
For setting the foreground color (or text color) of the entry widget, use the fg option.
The default is black. However, as we set the dark background color in the above examples, you may want a lighter color of the text.
The example below has two entry fields. One with the default black color and the second is yellow color for the foreground (fg) option.
Code:
#Entry fields text color

from tkinter import *

win = Tk()


win.geometry("350x200")

win.title("Entry Text Color")


lbl1 = Label(win, text = "fg = black").place(x = 30,y = 50)

lbl2 = Label(win, text = "fg = yellow").place(x = 30, y = 90)


txt1 = Entry(win, bg="brown", ).place(x = 120, y = 50)

txt2 = Entry(win, bg="green", fg = "yellow").place(x = 120, y = 90)


win.mainloop()
Output:
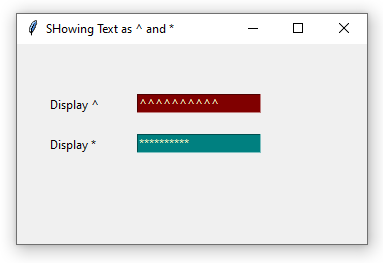
Show entered text as * or some other character – password field
By using show option of the entry widget, you may display entered characters as the specified character.
For example, you want to take the user password and display * for the entered character.
The example below shows “^” for the first entry field and “*” for the second field.
Code:
#Entry fields show option - ^ and *

from tkinter import *

win = Tk()


win.geometry("350x200")

win.title("SHowing Text as ^ and *")

lbl1 = Label(win, text = "Display ^").place(x = 30,y = 50)

lbl2 = Label(win, text = "Display *").place(x = 30, y = 90)


txt1 = Entry(win, bg="#800000", show="^" , fg = "#FFFFC6").place(x = 120, y = 50)

txt2 = Entry(win, bg="#008080", show="*", fg = "#FFFFC6").place(x = 120, y = 90)


win.mainloop()
Output:
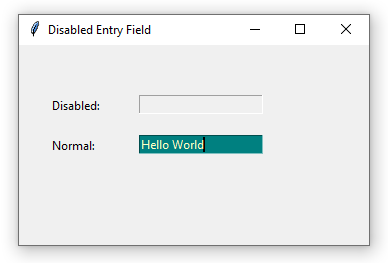
An example of disabled entry fields
By using state=DISABLED option, the entry field is visible as grayed-out element in the form. The default value of the state is NORMAL.
The example below displays two entry fields. The first is disabled and the other is normal.
Code:
#Disbaled Entry field example

from tkinter import *

win = Tk()


win.geometry("350x200")

win.title("Disabled Entry Field")


lbl1 = Label(win, text = "Disabled: ").place(x = 30,y = 50)

lbl2 = Label(win, text = "Normal: ").place(x = 30, y = 90)


txt1 = Entry(win, bg="#800000", state=DISABLED , fg = "#FFFFC6").place(x = 120, y = 50)

txt2 = Entry(win, bg="#008080", state=NORMAL, fg = "#FFFFC6").place(x = 120, y = 90)


win.mainloop()
Output:
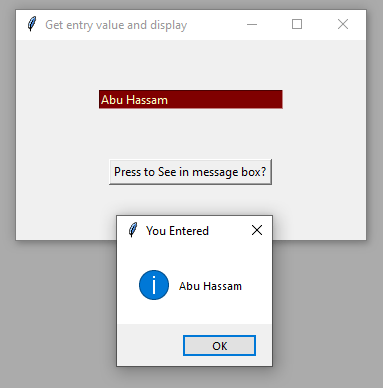
An example of using entry in a message box
In this example, we will get the value of the entry field and display it in the tkinter message box.
For that, execute the program and enter text into the entry field. After this, press the button and it will display the text of the entry in a message box.
Code:
#import tkinter library and messagebox

from tkinter import *

from tkinter import messagebox


#Create an instance of tkinter frame or window

win = Tk()

win.geometry("350x200")

win.title("Get entry value and display")


#Function to get entry value and display text in the message box

def disp_text():

   ent_txt=txt1.get()

   messagebox.showinfo("You Entered", ent_txt)


#Taking user input

txt1= Entry(win, bg="#800000", fg = "#FFFFC6", width=30)

txt1.pack(pady= 50)


#Create a button to display the text of entry widget

btn= Button(win, text="Press to See in message box?", command= disp_text)


btn.pack()

win.mainloop()
Sample output: