
Purpose of addClass method
The jQuery addClass method is used to add class(es) to specified HTML elements. You may add one or more classes in a single call.
If matched elements are more than one, the addClass method will add the given class(es) to all matched elements.
For example, if you specified “div” as a sector and your web page contains one or more divs, the jQuery addClass will add given classes to all div elements.
Syntax of addClass jQuery
This is how you can use the addClass method:
$(“selector”).addClass(“class_to_add”);
To add more than one classes, separate class names by space:
$(“selector”).addClass(“class1 class2”);
I will show you jQuery $.addClass demos with HTML div, table, link, button and list elements in the following section.
An example of using addClass with a div element
In the demo, a div is created without any class initially. As you click the button “Add Class to div”, it will add a CSS class created in the <style> section of <head> tag to that div. 
The following code is used in the click event of button to add a class:
$(document).ready(function(){

$("#btnaddcls").click(function(){

$("#divcls").addClass("addcls");

});

});
See the complete code that you may try in your local computer:
<!DOCTYPE html>
<html>
<head>
<script src="https://code.jquery.com/jquery-1.10.1.min.js"></script>
</script>
<script>
$(document).ready(function(){
  $("#btnaddcls").click(function(){
    $("#divcls").addClass("addcls");
  });
});
</script>
<style>

.addcls
{
  background: #D9534F;
  width:220px;
  border-radius: 15px;
  padding:20px;
  font-size:22px;
  color:#fff;
}


</style>
</head>
<body>

<div id="divcls">Click the button to add a CSS class in div</div>
<p>
<button id="btnaddcls">Add Class to div</button>
</p>
</body>
</html>
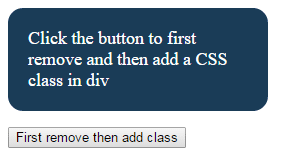
A demo of addClass with a div having a class already
Generally, the addClass method is used with the removeClass method. For that, first remove the used class by using removeClass method which is followed by addClass jQuery method. See this demo online:
This time, the following code is used in the <script> section:
  $("#btnaddcls").click(function(){

$(".divcls").removeClass( "divcls" ).addClass( "addcls" );

});
Code:
<!DOCTYPE html>
<html>
<head>
<script src="https://code.jquery.com/jquery-1.10.1.min.js"></script>
</script>
<script>
$(document).ready(function(){
  $("#btnaddcls").click(function(){
    $(".divcls").removeClass( "divcls" ).addClass( "addcls" );
  });
});
</script>
<style>

.addcls
{
  background: #D9534F;
  width:220px;
  border-radius: 15px;
  padding:20px;
  font-size:22px;
  color:#fff;
}

.divcls{
  background: #1A3C57;
  width:220px;
  border-radius: 15px;
  padding:20px;
  font-size:18px;
  color:#fff;
}
</style>
</head>
<body>

<div class="divcls">Click the button to first remove and then add a CSS class in div</div>
<p>
<button id="btnaddcls">First remove then add class</button>
</p>
</body>
</html>
You see, first I removed the divcls CSS class that was applied initially. After that, I used addClass method to add the addcls class to that div.
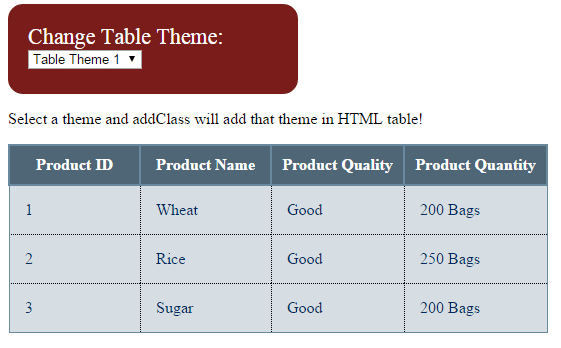
A demo of addClass with HTML table
In this demo, an HTML table is created with a default class. A dropdown is also given where you may choose a different theme or class for that table.
As you select a theme from the dropdown, the new theme will be applied to that table by using jQuery addClass method. First, have a look at that demo:
See online demo and code
You can see the code in the demo page which is lengthy. As my focus is to explain the addClass method, so let me dig into this only.
The HTML table was created with an id=tbl and the demotbl class which is defined in the <style> section. The <style> section has two other classes for that table.
In the dropdown, the values are set to the class names that I created in the <style> section.
As you select an option, the select change event happens, which is used in the <script> section just above the </body> tag. The selected value is assigned to a variable:
var themetbl = document.getElementById("selecttheme").value;
The next line of code removes the existing class by using removeClass method and adds the new class by using addClass method:
$("#tbl").removeClass( ).addClass( themetbl );
That’s it!
Similarly, you can use the addClass method to add the class(es) in HTML buttons. In this example, as you click the button, a class of CSS will be added to that button that contains properties to change the background, border, font-size, font-family etc. of that button.

Code:
<!DOCTYPE html>
<html>
<head>
<script src="https://code.jquery.com/jquery-1.10.1.min.js"></script>
</script>
<script>
$(document).ready(function(){
  $("#btaddclass").click(function(){
    $("#btaddclass").addClass("btnaddcls");
    $("#btaddclass").html('New Class Added');
  });
});
</script>
<style>
.btnaddcls{
    background-color:#4F6677;
    border: #2e6da4;
  	font-family: Arial, Geneva, Arial, Helvetica,  sans-serif;
	font-size: 15px;
    color: #FFFFFF;
    letter-spacing: 1px;
    padding: 8px 12px;
    font-size: 14px;
    font-weight: normal;

    border-radius: 4px;
    line-height: 1.5;
    text-decoration:none;
}
</style>
</head>
<body>

<button id="btaddclass">Add Class to this button</button>

</body>
</html>
A demo with HTML lists
In this example, I have created a list with a few menu items. Three links are given under the menu to change the theme. Upon clicking each link, the click event of that link occurs where I used the addClass method with removeClass to add the new class.
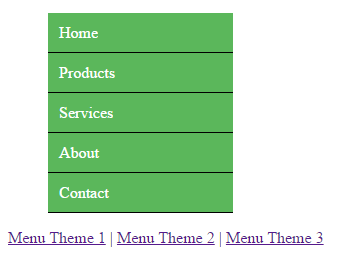
Basically, the <li> and <a> tags of menu are contained in the <div> element which CSS class is changed at the click event of respective link by using this code:
  $("#addclass").click(function(){

$("#mainmenu").removeClass().addClass("men_ex");

});


$("#addclass2").click(function(){

$("#mainmenu").removeClass().addClass("men_ex2");

});


$("#addclass3").click(function(){

$("#mainmenu").removeClass().addClass("men_ex3");

});
See the complete code below:
<!DOCTYPE html>
<html>
<head>
<script src="https://code.jquery.com/jquery-1.10.1.min.js"></script>
</script>
<script>
$(document).ready(function(){
  $("#addclass").click(function(){
    $("#mainmenu").removeClass().addClass("men_ex");
  });

  $("#addclass2").click(function(){
    $("#mainmenu").removeClass().addClass("men_ex2");
  });

  $("#addclass3").click(function(){
    $("#mainmenu").removeClass().addClass("men_ex3");
  });

});
</script>
<style>
.men_ex{
    border-radius:5px;
}
.men_ex ul {
    width:185px;
    list-style-type: none;
}

.men_ex ul li a {
    text-decoration: none;
    color: #fff;
    padding: 10.5px 11px;
    background-color: #4EBBDB;
    display:block;
    border-bottom:solid 1px #000;
}

/*Menu Theme 2*/
.men_ex2{
    border-radius:5px;
}
.men_ex2 ul {
    width:185px;
    list-style-type: none;
}

.men_ex2 ul li a {
    text-decoration: none;
    color: #fff;
    padding: 10.5px 11px;
    background-color: #5BB75B;
    display:block;
    border-bottom:solid 1px #000;
}

/*Menu Theme 3*/
.men_ex3{
    border-radius:5px;
}
.men_ex3 ul {
    width:185px;
    list-style-type: none;
}

.men_ex3 ul li a {
    text-decoration: none;
    color: #fff;
    padding: 10.5px 11px;
    background-color: #F0AC4D;
    display:block;
    border-bottom:solid 1px #000;
}

</style>
</head>
<body>

<div class="men_ex" id="mainmenu">
<ul>
<li><a href="#">Home</a></li>
<li><a href="#">Products</a></li>
<li><a href="#">Services</a></li>
<li><a href="#">About</a></li>
<li><a href="#">Contact</a></li>
</ul>
</div>
<a href="#" id="addclass">Menu Theme 1</a> |
<a href="#" id="addclass2">Menu Theme 2</a> |
<a href="#" id="addclass3">Menu Theme 3</a>

</body>
</html>
Also see: jQuery removeClass