
The 3D parallax scrolling effect by using jQuery
In this tutorial, I will show you how to create the parallax scrolling effect on any content type by using a jQuery-based parallax plug-in, parallux.
FYI, if you have not heard of this earlier, the parallax effect is the one where foreground moves faster than the background. In the background, generally, 3D images are used.
The parallux plug-in uses translate 3D which is a CSS3 property. Due to this, you may use different types of content like images, videos, text, sliders etc in the background layer (rather than only images).
See the following section for the live demos and how to set up this plug-in for your website.
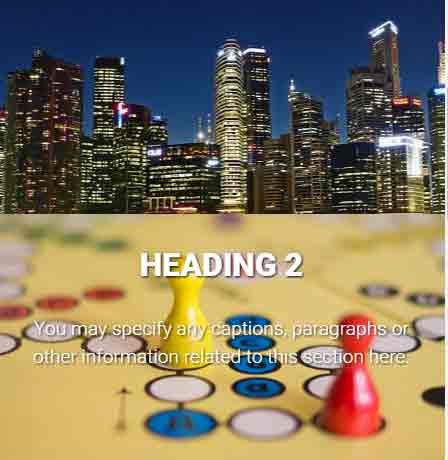
A demo of jQuery parallax effect
The plug-in has options to use both layers i.e. foreground and background. To give scrolling a normal speed, use the foreground layer. For the parallax effect, use the background layer.

In this demo, images are used as background for parallax scrolling. With each background image, the content for the foreground, which is a heading and some text is used. Have a look at the demo which is followed by setting up the dependencies and running this on your web pages (get the plug-in from the link given at the bottom or by View page source the demo page and download JS and CSS files):

Online demo and code
For setting up this scrolling parallax, first include the main CSS file in the <head> section. The CSS specific to this demo is also included here:
<link rel=”stylesheet” href=”https://cdnjs.cloudflare.com/ajax/libs/normalize/4.1.1/normalize.min.css”>
<link href=’http://fonts.googleapis.com/css?family=Roboto:400,900,300′ rel=’stylesheet’ type=’text/css’>
<!– Main CSS file of the plug-in –>
<link rel=”stylesheet” href=”css/jquery.parallux/jquery.parallux.min.css”>
<!– The style file particular to this demo –>
<link rel=”stylesheet” href=”css/jquery.parallux/demos.css”>
The markup:
<div class="parallux">
<!-- Define background here -->
<div class="parallux-bg fixed">
<div class="parallux-inner dark">
<!-- Put you content like images, video or any other HTML here -->
<img class="cover" src="https://www.jquery-az.com/jquery/images/slider-image-1.jpg">
</div>
</div>

<!-- Foreground - that will scroll normal -->
<div class="text">
<h2>The heading - Foreground</h2>
<p>This section will scroll normal. You may specify any captions, paragraphs or other information related to this section here.</p>
</div>

</div>
<section class="separator">
<h4>Heading for normal content</h4>
<p> This is non parallax section. Use any information, images etc. here</p>
</section>
<div class="parallux">
<div class="parallux-bg fixed">
<div class="parallux-inner light">
<img class="cover" src="https://www.jquery-az.com/jquery/images/slider-image-2.jpg">
</div>
</div>
<div class="text">
<h2>Heading 2</h2>
<p>You may specify any captions, paragraphs or other information related to this section here.</p>
</div>
</div>
<section class="separator">
<h4>Heading 3 - Normal content</h4>
<p> Some informaiton here.</p>
</section>
<div class="parallux">
<div class="parallux-bg fixed">
<div class="parallux-inner dark">
<img class="cover" src="https://www.jquery-az.com/jquery/images/strawberries.jpg">
</div>
</div>
<div class="text">
<h2>Heading 4</h2>
<p>You may specify any captions, paragraphs or other information related to this section here.</p>
</div>

</div>
- First of all, a parallax item is created by using the parallux CSS class. After that, the background layer is specified by using parallux-bg fixed
- Inside that, another div tag is used for placing the HTML content for the background layer. You may place image, video or other HTML content there that will scroll slowly.
- After that div tag, a div with text CSS class is created for the foreground layer.
Above the </body> tag, place the jQuery and plug-in JS files with jQuery code for initiating the parallax:
<script src=”https://ajax.googleapis.com/ajax/libs/jquery/1.12.3/jquery.min.js”></script>
<script>
$(function() {
$(".parallux").parallux();
});
</script>
That’s it. Get the complete code from the demo page at the bottom part.
Another demo with different style
In this demo, three images are used as background that is adjacent to each other and takes full height (specified in the jQuery code by using fullHeight option of the plug-in)
The images in this demo are specified in the CSS file that is referred to by ID in the div using the parallux-inner class. The markup for creating the parallax effect:
<div class="parallux">
<!-- Define background here -->
<div class="parallux-bg fixed">
<div class="parallux-inner" id="bg-1">
</div>
</div>

<!-- Foreground - that will scroll normal -->
<div class="text">
<h2>The heading - Foreground</h2>
<p>This section will scroll normal. You may specify any captions, paragraphs or other information related to this section here.</p>
</div>

</div>
<div class="parallux">
<div class="parallux-bg fixed">
<div class="parallux-inner" id="bg-2">
</div>
</div>
<div class="text">
<h2>Heading 2</h2>
<p>You may specify any captions, paragraphs or other information related to this section here.</p>
</div>
</div>
<div class="parallux">
<div class="parallux-bg fixed">
<div class="parallux-inner" id="bg-3">
</div>
</div>
<div class="text">
<h2>Heading 3</h2>
<p>You may specify any captions, paragraphs or other information related to this section here.</p>
</div>

</div>
The script:
<script>
$(function() {
$(".parallux").parallux({
onMobile: 'fixed',
fullHeight: true
});
});
</script>
The code can be taken from the demo page’s bottom part.
Credit: tomsarduy