Margin utility classes in Tailwind CSS
In order to create space around the HTML element’s defined borders, we use the CSS margin property.
Tailwind CSS has utility classes for controlling the margin for elements.
A few Tailwind margin classes
Using these classes adds the margin in elements:
m-0 = margin: 0px;
mx-0 = margin-left: 0px; margin-right: 0px;
my-0 margin-top: 0px; margin-bottom: 0px;
m-px margin: 1px;
me-px margin-inline-end: 1px;
m-1 margin: 0.25rem; /* 4px */
my-2 margin-top: 0.5rem; /* 8px */
margin-bottom: 0.5rem; /* 8px */
Tailwind has a big list of pre-defined utility classes for margin that you can see here.
Tip: In order to remember margin/padding classes and meaning in Tailwind, the margin classes starts with m while padding with p letter. The second letter:
t = top e.g. mt-2
b = bottom e.g. pb-5 and so on.
l = left e.g. ml-5
r = Right e.g. pr-8
x = Left and Right e.g. mx-2 (adds margin in left and right)
y = Top and Bottom e.g. py-5 (Adds 5px padding in top and bottom)
Padding utility classes in Tailwind CSS
Similarly, Tailwind has classes for padding in the HTML elements. CSS padding properly adds spacing between the content and border of HTML elements.
First, have a look at a few utility classes of padding in Tailwind and then we will show how padding and margin utilities work in different HTML elements.
p-0 padding: 0px;
px-px padding-left: 1px;
padding-right: 1px;
pr-px padding-right: 1px;
p-0.5 padding: 0.125rem; /* 2px */
pb-0.5 padding-bottom: 0.125rem; /* 2px */
ps-1 padding-inline-start: 0.25rem; /* 4px */
pl-1.5 padding-left: 0.375rem; /* 6px */
pr-2 padding-right: 0.5rem; /* 8px */
See the complete padding utility classes list here.
In this following section, we will show examples of using these margin and padding classes with various elements.
An example using Tailwind padding classes
In the first example of Tailwind utility classes for padding, we will show you three boxes with and without Tailwind padding.
The image shows three boxes without padding below:
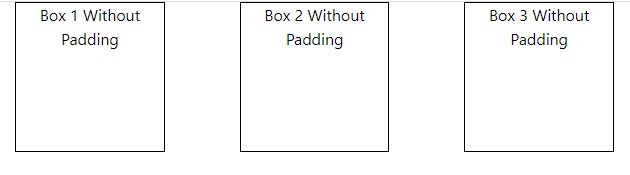
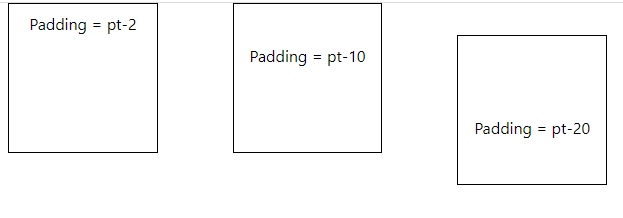
Then we applied various padding utilizes and you can see the difference in the content space of the first and second image.
<!DOCTYPE html>

<html>

<head>

<script src="https://cdn.tailwindcss.com"></script>


    <style>

.box {


    border:solid 1px;

    height:150px;

    width:25%

}


</style>

</head>


<body class="text-center mx-4 space-y-2">


<div class="flex flex-1 flex-wrap justify-between gap-2 dark:text-neutral-800">


<div class="pt-2 box">Padding = pt-2</div>

<div class="pt-10 box">Padding = pt-10</div>

<div class="pt-20 mt-8 box">Padding = pt-20</div>

</div>


</body>
</html>
Note: we just added padding utilities as compared to images without padding in above code.
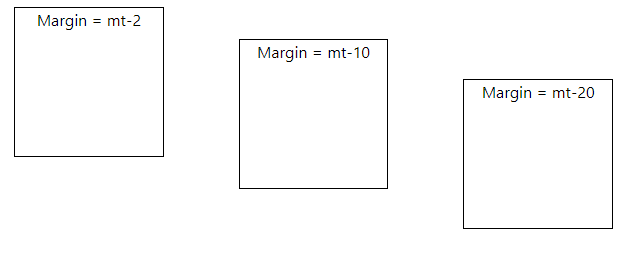
The example of margin utilities
For showing the margin utility class’s demo, again we have three boxes. With margin utility classes, the gap between the box should vary as compared to without using margin.
Also, the content is at the same place from the box’s borders as we have not used padding classes.
Code:
<!DOCTYPE html>

<html>

<head>

<script src="https://cdn.tailwindcss.com"></script>

<style>

.box {


    border:solid 1px;

    height:150px;

    width:25%

}

</style>

</head>

<body class="text-center mx-4 space-y-2">


<div class="flex flex-1 flex-wrap justify-between gap-2 dark:text-neutral-800">


<div class="mt-2 box">Margin = mt-2</div>

<div class="mt-10 box">Margin = mt-10</div>

<div class="mt-20 box">Margin = mt-20</div>

</div>


</body>

</html>
Output:
A demo of using Tailwind margin/padding classes in form elements
For this example, we have an HTML form with CSS style.
To increase the spacing between Form elements and within its contents (textboxes, labels, and button), we used margin and padding utilities (along with other classes) as shown in the example below:
Code:
<!DOCTYPE html>

<html>

<head>

<script src="https://cdn.tailwindcss.com"></script>

</head>


<body class="text-center mx-4 space-y-2">

<div class="w-full max-w-xs">

  <form class="bg-blue px-8 pt-4 pb-4 mb-8 shadow-lg shadow-cyan-500/50 rounded">

    <div class="mb-8">

      <label class="block text-red-600 text-lg font-bold mb-4" for="uname">

        Enter Username

      </label>

      <input class="shadow-md  border w-full py-2 px-3 text-gray-500  focus:outline-none focus:shadow-outline round" id="uname" type="text" placeholder="Username Here">

    </div>

    <div class="mb-6">

      <label class="block text-red-600 text-lg font-bold mb-4" for="password">

        Enter Password

      </label>

      <input class="shadow-md border border-red-500 w-full py-2 px-3 text-gray-700 mb-3 focus:outline-none focus:shadow-outline round" id="password" type="password" placeholder="**********">

    </div>

    <div class="flex items-center justify-between">

      <button class="bg-green-600 hover:bg-green-800 text-white font-bold py-3 px-6 rounded focus:outline-none focus:shadow-outline" type="button">

        Log In

      </button>

    </div>

  </form>

</div>

</body>

</html>
Output:
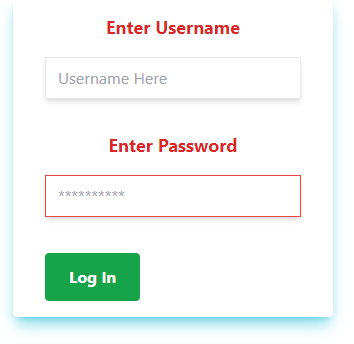
Notice the <form> tag where px-8, pt-4, pb-4 classes are used for padding and mb-8 for the margin – along with other classes.
Similarly, in the <label>, <input>, and <button> tags, the padding and margin classes are used.
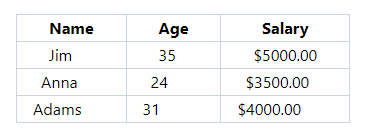
Using padding in the table example
The demo below adds padding unities to the table header and table data for increasing space between the text and borders.
In the first image, the table is without padding and uses just a few border classes. Also, the margin is added at the first div level:
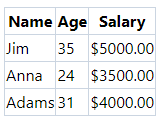
In the example below, we added px-8, px-6, and px-4 padding utility classes in the header and table data. It adds spacing of 8px, 6px, and 4px from left and right.
Code:
<!DOCTYPE html>

<html>

<head>

<script src="https://cdn.tailwindcss.com"></script>

</head>


<body>

<div class="flex flex-5 mx-8 mt-10  justify-between gap-2">

<table class="border-collapse border border-slate-400 ">

  <thead>

    <tr>

      <th class="border border-slate-300 px-8">Name</th>

      <th class="border border-slate-300 px-8">Age</th>

      <th class="border border-slate-300 px-8">Salary</th>

    </tr>

  </thead>

  <tbody>

    <tr>

      <td class="border border-slate-300 px-8">Jim</td>

      <td class="border border-slate-300 px-8">35</td>

      <td class="border border-slate-300 px-8">$5000.00</td>

    </tr>

    <tr>

      <td class="border border-slate-300 px-6">Anna</td>

      <td class="border border-slate-300 px-6">24</td>

      <td class="border border-slate-300 px-6">$3500.00</td>

    </tr>

    <tr>

      <td class="border border-slate-300 px-4">Adams</td>

      <td class="border border-slate-300 px-4">31</td>

      <td class="border border-slate-300 px-4">$4000.00</td>

    </tr>

  </tbody>

</table>


</div>

</div>

</body>


</html>
Output: