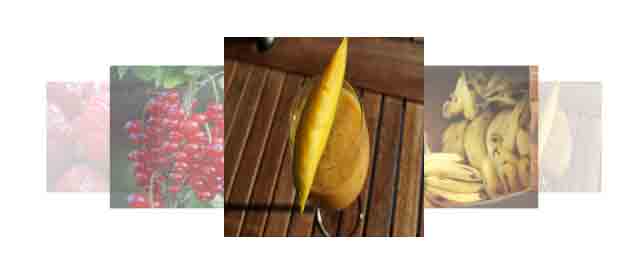
The carousel on your website can easily be created if you are using the Materialize CSS framework. All you require is using the carousel class in the wrapper element for carousel component and using the <a> tags with carousel-item where you also provide image source for each slide.
The carousel can be full-screen width with images only or mixed content or you may also create a carousel with smaller images that can slide by swiping in smart phones.
The following section shows the examples of using the Materialize carousel with live demos and complete code.
An example of materialize carousel
The simple carousel is created by referring the carousel class in the main container element. The carousel items are created as shown in the example code below:

Online demo and code
The markup:
<div class="carousel" id="demo-carousel">

    <a class="carousel-item" href="#one!"><img src="images/banana.jpg"></a>

    <a class="carousel-item" href="#two!"><img src="images/mango.jpg"></a>

    <a class="carousel-item" href="#three!"><img src="images/strawberries.jpg"></a>

    <a class="carousel-item" href="#four!"><img src="images/currant.jpg"></a>

    <a class="carousel-item" href="#five!"><img src="images/mango.jpg"></a>

  </div>

</div>
A little script for initializing the carousel:
<script>

$(document).ready(function(){

      $('#demo-carousel').carousel();

    });

</script>
An example of a full-width slider
Rather than creating overlapped sliding image slide, as in the above demo, you may create a full width slider with a single image displayed at a time.
For that, use the carousel-slider class along with carousel class in the div tag. In the jQuery code, use the fullWidth option with value = true as shown below:
The markup:
<div class="carousel carousel-slider" id="demo-carousel">

    <a class="carousel-item" href="#one!"><img src="images/banana-2.jpg"></a>

    <a class="carousel-item" href="#two!"><img src="images/mango-2.jpg"></a>

    <a class="carousel-item" href="#three!"><img src="images/strawberries-2.jpg"></a>

    <a class="carousel-item" href="#four!"><img src="images/currant-2.jpg"></a>

    <a class="carousel-item" href="#five!"><img src="images/mango-2.jpg"></a>

</div>
The script:
<script>

$(document).ready(function(){

 $('#demo-carousel').carousel({fullWidth: true});

});

</script>
Adding indicators in the carousel
To let the users know the current slide or allowing them moving to a specific slide directly, you may add indicators in a carousel.
For adding indicators, you may use data attribute data-indicators=”true” in the main container div element. This adds whitish circles towards the bottom of the carousel as shown below:

The code:
<div class="container">

<h3>Materialize Carousel Demo</h3>

<div class="carousel carousel-slider" id="demo-carousel-indicators" data-indicators="true">

    <a class="carousel-item" href="#one!"><img src="images/banana.jpg"></a>

    <a class="carousel-item" href="#two!"><img src="images/mango.jpg"></a>

    <a class="carousel-item" href="#three!"><img src="images/strawberries.jpg"></a>

    <a class="carousel-item" href="#four!"><img src="images/currant.jpg"></a>

    <a class="carousel-item" href="#five!"><img src="images/mango.jpg"></a>

</div>

</div>


<script>

$(document).ready(function(){

 $('#demo-carousel-indicators').carousel({fullWidth: true});

});

</script>
The slider that moves automatically
In all above examples, the slides move by mouse drag or swiping in smartphones. In the data indicators example, the slider can also move by clicking the small circle.
For making the slider/carousel move automatically, there is no specific method or option like auto: true. However, you may use the next option and specify the time there e.g. 1000 (one second), 2000 for two seconds etc. Use the next option in the setInterval function as follows:
The code for this demo:
<div class="container">

<h3>Materialize Carousel Demo</h3>

<div class="carousel carousel-slider" id="demo-carousel-auto" data-indicators="true">

    <a class="carousel-item" href="#one!"><img src="images/banana.jpg"></a>

    <a class="carousel-item" href="#two!"><img src="images/mango.jpg"></a>

    <a class="carousel-item" href="#three!"><img src="images/strawberries.jpg"></a>

    <a class="carousel-item" href="#four!"><img src="images/currant.jpg"></a>

    <a class="carousel-item" href="#five!"><img src="images/mango.jpg"></a>

</div>

</div>


<script>

$(document).ready(function(){

 $('#demo-carousel-auto').carousel();

  setInterval(function() {

    $('#demo-carousel-auto').carousel('next');

  }, 1500);


});

</script>
You can see, slides are moving at an interval of 1500 milliseconds i.e. 1.5 seconds.
The demo of content slider
The following example shows creating a carousel that contains images as well as text. For adding fixed items in the carousel, use the carousel-fixed-item class in a div. Open the example page by clicking the link or image below. There, you will see three slides with images and overlay text:

Complete code for this example
<!DOCTYPE html>
<html>
 <head>
  <link rel="stylesheet" href="https://cdnjs.cloudflare.com/ajax/libs/materialize/0.100.2/css/materialize.min.css">

  <link href="https://fonts.googleapis.com/icon?family=Material+Icons" rel="stylesheet">
  <script type = "text/javascript" src = "https://code.jquery.com/jquery-2.1.1.min.js"></script>
  <script src="https://cdnjs.cloudflare.com/ajax/libs/materialize/0.100.2/js/materialize.min.js"></script>

 </head>

<body>
<div class="container">
<h3>Materialize Carousel Demo</h3>
<div class="carousel carousel-slider" id="demo-carousel-content" data-indicators="true" >

  <a class="carousel-item" href="#one!"><img src="images/banana.jpg"></a>


   <div class="carousel-fixed-item center">
     <h2 class="white-text">Heading for the Carousel</h2>
      <p class="white-text">The caption/description for the caousel</p>
      <a class="btn waves-effect orange lighten-3 black-text darken-text-2">More Info</a>
    </div>

    <a class="carousel-item" href="#two!"><img src="images/mango.jpg">
      </a>
   <a class="carousel-item" href="#two!"><img src="images/mango.jpg">
      </a>

  </div>


</div>

<script>
$(document).ready(function(){
 $('#demo-carousel-content').carousel();
  setInterval(function() {
    $('#demo-carousel-content').carousel('next');
  }, 2000);

});
</script>
</body>
</html>
