
Before explaining what is Git pull command and how it works, let me show you a simple command that pulls a remote branch from the Github repository to the local repo.
The command:
$ git pull origin master
The command should fetch content from the set remote repository into the local repo.
If you have not set remote repo or unsure, use this command to check what the current repo is set in Git Bash by this command:
$ git remote –v
The screenshot below shows current set URLs on Github on my Git Bash:

A step by step guide for creating and pulling a remote branch
If you are a beginner then this guide is particularly for you. In this section, I will show you a step by step for creating an online repository (on Github), adding files and then by using the pull command on Git Bash, we will fetch and download the branch in our local repository – so keep reading.
Creating a repository on Github
This is simple and straight forward – go to Github website, create an account (if you have not already) and you will lead to creating a new repository.
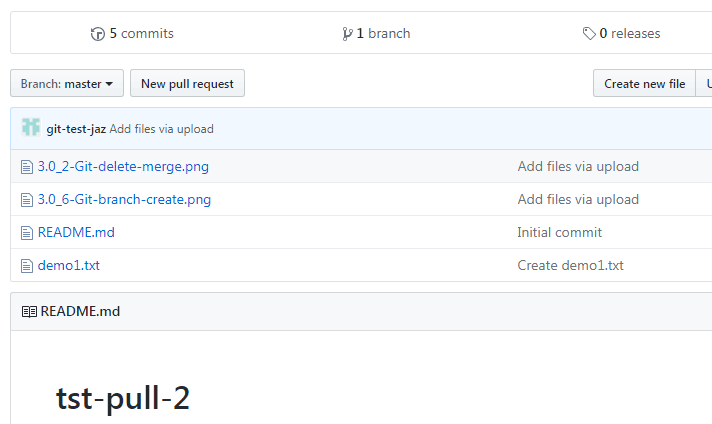
I have created a new repo with the name of tst-pull-2 for our demo.
By default, it contains one branch i.e. master and as I created the repository with a “README” so it also contains this file.
Our pull operation shows some “substance” after we download in our local repository, I have added a few files in the master branch as shown below.
Performing the fetch and merge
While our topic is Git pull, why I used two other command names in above heading? This is because the pull Git command is the combination of fetch and merge commands. I will explain this after completing the pulling command below.
For downloading the remote repo content, run the Git pull command as follows.
Add the remote origin
Use this command to add the origin to our newly created remote repository:
$ git remote add origin “https://github.com/git-test-jaz/tst-pull-2.git”
Change the URL if you are using some other repo.
(For learning more about how to open Git Bash and set path, visit this tutorial)
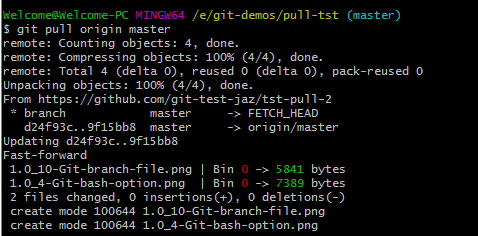
After adding the origin, let us run the git pull command for downloading the remote repo:
$ git pull origin master
This command should download all files from the remote repo to the local. The Git Bash should display messages like this:
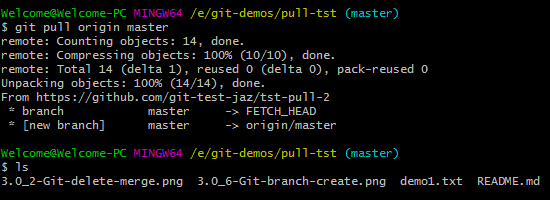
In the graphic, you can see two commands’ output. One is for the git pull command and the other displays the files in the master branch by using $ ls command.
You can see, it is showing all four files as in our remote repository in above graphic.
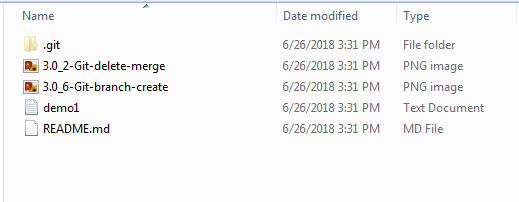
Similarly, you may go to the local active folder where you started Git Bash and see the local repo. This is what our demo folder “pull-tst” on Windows system contains after running pull command:
So, how git pull command works?
Back to our question, why we used “fetch” and “commit” terms while talking about pull command. The reason is pull command is the combination of fetch and commit commands.
As we ran $ git pull in above section, the pull command executed git fetch and downloaded the content from the remote branch.
This is followed by execution of git merge by pull command.
How about using Pull command for existing repositories?
In the above section, we learned how to create an online repo and pulling its master branch in the local repo by the pull command of Git.
How about making changes in an existing repo/branch in the remote server and then using the pull command.
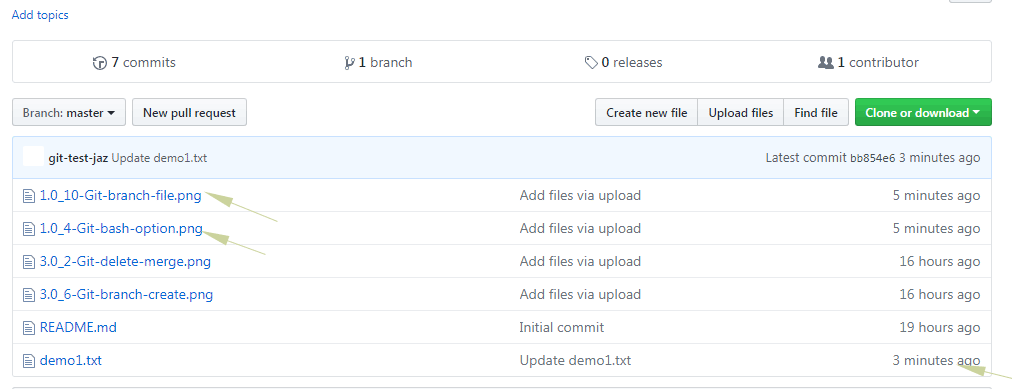
For example, we added two more image files after performing above operation. For explaining, I also changed the content of demo1.txt file. So, this is how our online repo on Github looks:
If you run this command again on Git Bash:
$ git pull origin master
The following message is displayed:
Similarly, the local folder on Windows system should show the newly added images as well as the updated text file.
Pull without new merge commit
The following pull command downloads / fetches the content of the remote repository. However, it will not create a new merge commit:
$ git pull –no-commit <remote>
Performing pull operation via Git GUI
If you are a fan of GUI rather than using command line then you may also use Git GUI for performing pull remote operation.
However, the GUI for Git does not provide a direct option for executing the pull command (like many other commands). It has menu options for “fetch” and “merge” that you may execute separately.
Follow the instructions below for performing a git pull remote operation via GUI.
Step 1 – Open GUI for Git
First of all, open the GUI from the local repository as shown in the graphic below:
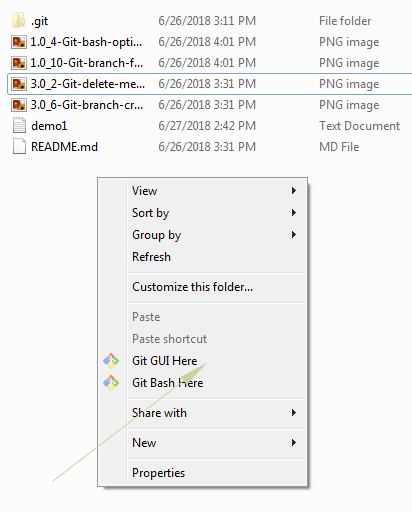
For that, right click after opening the folder content and select the “Git GUI Here” option on the Windows system.
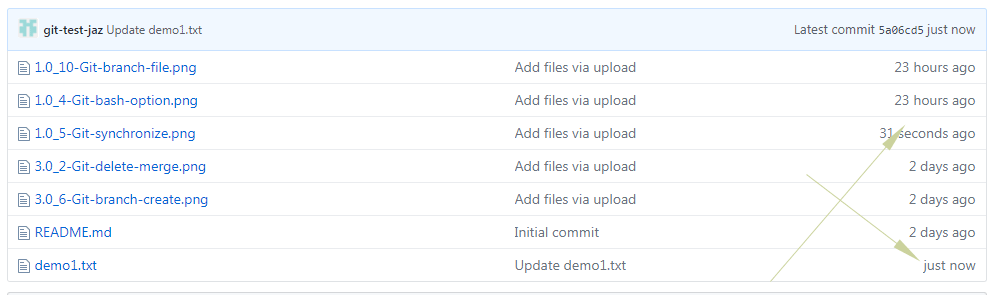
Step 2 – Done with changes in the remote repo?
Before using the GUI, make sure all changes are done in the remote repository. For the example, I have added another image file and also update the “demo1.txt” file content so our Git GUI pull operation downloads and merge two changes. The graphic below shows these two changes:
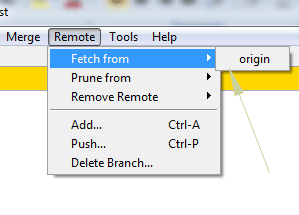
Step 3 – Performing the fetch operation form Git GUI
Go to the Git GUI and look for the “Remote” on the top menu. Click this and it should show “Fetch From” –> Origin.
As you press this option, a new window should appear and display the progress for changes from the origin.
After green bar appears with the success message, press “Close”.
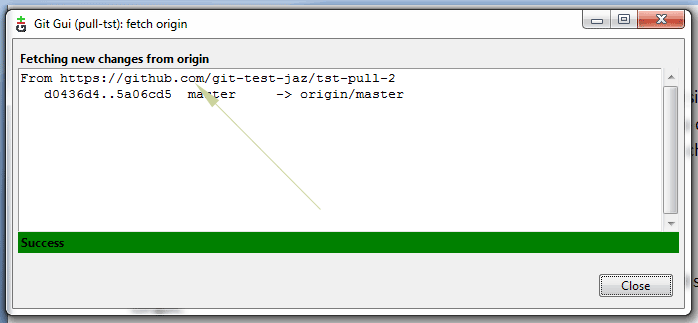
Until now, only fetch operation is completed. If you look at the look repo folder, it should not display the new image that I added in the remote repository. Also, demo1.txt should not show the recent changes made.
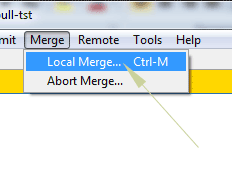
Step 4 – Merge Menu
The final step for completing the pull operation is performing the merge. For that, go to the “Merge” –> “Local Merge” option in top menu or press “Ctrl + M”.
A new window should appear with a few options as shown below:
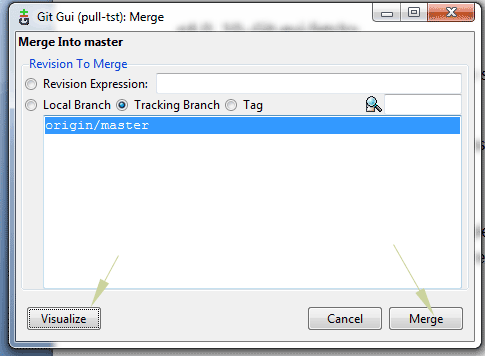
You may press the “Merge” button or “Visualize” the changes before performing a merge.
As the “Merge” button is pressed, yet a new window appears and displays the progress with the merge complete operation success message.
Close the window and go to the local repository folder again. There, you should see newly added files along with updated changes in the text file.
How to add pull command in Git GUI?
You may add any command in Git GUI by using the “Tools” menu.

For adding the git pull command, go to the Tools –> Add and in the next window that appears, enter the name and command in the text boxes. Enter the pull command there (with branch) and enter a name.
Select appropriate options and press “Add”. If you go to the Tools menu again, it should show the added command in the menu as shown in above graphic.
Why there is no direct pull option in GUI?
While there may be a difference of opinion, this is recommended to perform fetch + merge (step by step) rather than pull operation (fetch/merge together).
The fetch command execution allows you seeing the changes before making actual modifications in the repo.
The pull command might be considered for the “power-users”.
Anyway, if you are comfortable with using the pull command then go ahead with this.