
This tutorial explains how to create a new branch in Git (locally and remotely). For details, see the section after the general command below.
Suppose you want to create a new branch in Git with the name of “hello-git”. The command for creating a new branch locally:
A local branch namely “hello-git” should have been created.
A step-by-step guide to creating branches for beginners
If you just require the syntax of how to create a new branch, the above command should work for you. For beginners, what creating a branch involves and what it produces should keep reading the tutorial.
The next section describes the following:
- Create a repository in Github website
- Add files in this repo
- Create a repository in the local machine
- Running Git Bash on the local machine and pulling the Github repo
- Create a local branch based on the master branch using Git Bash
- Creating a remote branch
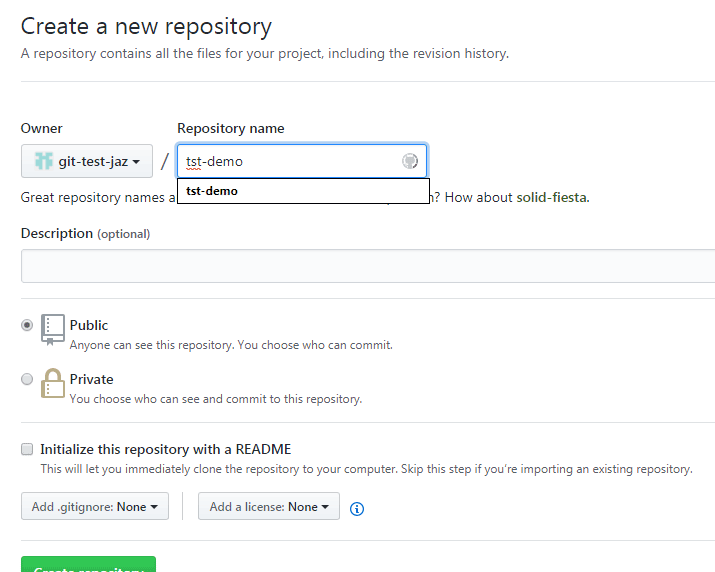
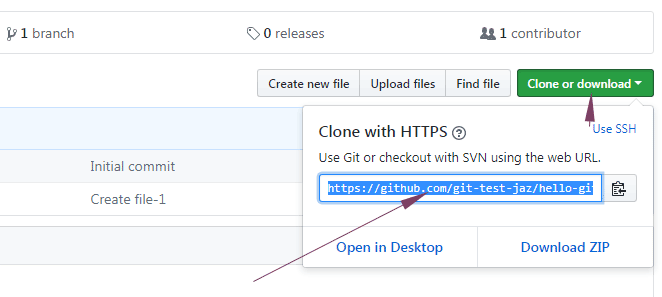
Step 1: Create a repository on Github
After creating an account on Github website, you may create a repository that stores all your files (including code files). For the demo, I named it “tst-demo”.
For branch testing, let us create a file in this repository so that we can see later what a branch contains.
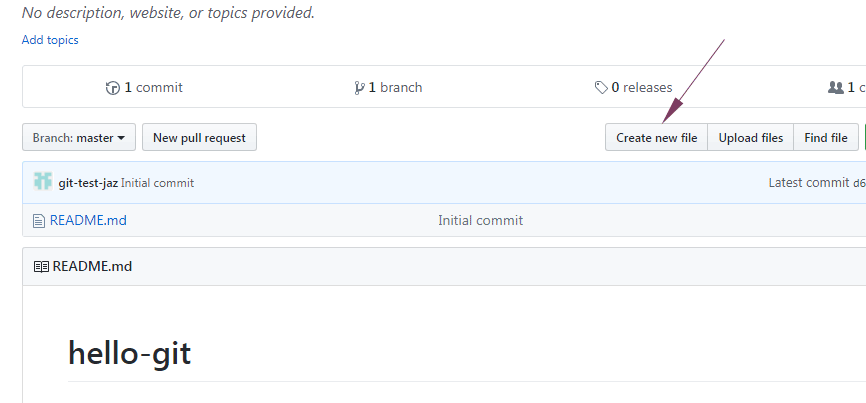
For the demo, I have created ‘file-1’ and just a line of text. Our repository now contains two files as shown below:

Step 2: Working in Git Bash
I have installed Git software on Windows machines with Git Bash. If you have not done so, you may install it by visiting this website and downloading/installing it on your machine.
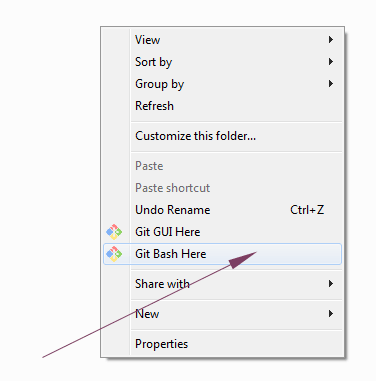
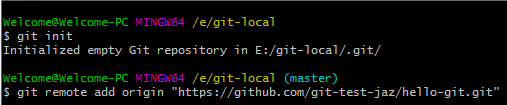
Now go to the directory where you want to create a local repository. For the demo, I used E drive and created a folder “git-local”.
Open that folder and right click on it and press the “Git Bash Here” option as shown below.
This should open the command line prompt for the Git Bash where you may write commands to work with this version control system.
Step 3: pull Github repo into the local machine
Until now, our local folder contains nothing. First, we will synchronize the Github repository with the local repository.
First of all, run the following command on Git Bash:
Now, if you look at the folder, it should show .git folder.
Synchronizing with Github repo
Now run this command to synchronize your remote repository with the local. You have to specify the path that you may get from Github website as shown below:
The command:
You have to change the URL as per your repo.
After executing this command in Git Bash, this should show no message.
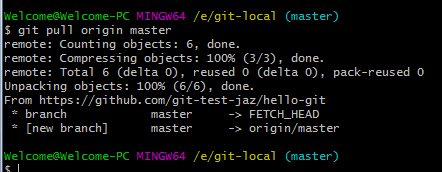
Use this command to pull files from the remote repository:
This command should pull all files from the “master” branch in the remote repo into your local repo.
See the graphics below for what this command resulted in:
And see what the folder contains now:
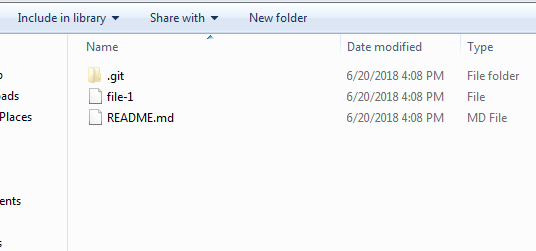
You can see that the local repo now contains both files that we have in the remote repository (on Github website).
Creating a branch locally
Finally, we reached the topic for what you are here “How to create a new branch”.
Go to Git Bash and write this command to create a new branch based on the master branch:
This should create a new branch namely “hello-git-branch”. If you want to see the content of this branch then run this command:
This command should switch us from the master branch to the newly created “hello-git-branch” branch.
To see what it contains, run this command:
To show the difference, the graphic below lists the content of the master branch as well as the newly created branch.
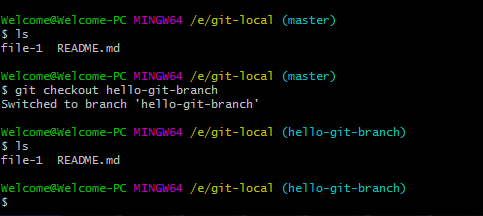
You can see, that both branches contain the same content.
Now you may work on the locally created branch independently.
Adding files in local branch example
We have two branches in our local repository now. First, the master branch and the other that we just created i.e. hello-git-branch.
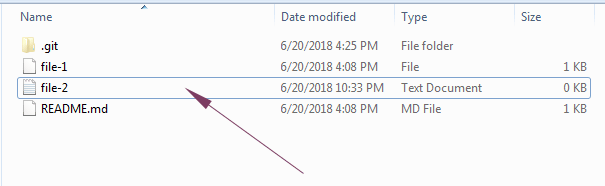
As we checkout and in the hello-git-branch branch. Now, let me add a file in the local repo while working in hello-git-branch branch and see if it affects the master branch or not.
For that, I am adding a new file to the local system folder that we created for our examples. Just to remind you, this folder contains two files i.e. README.md and file-1.
For the demo, I have added another file “file-2.txt” as shown below.
Let me go back to Git Bash and see if both branches are showing this file or not.
I assume you are already in “hello-git-branch” by running this command:
After that, run this command to add file-2.txt:
This is followed by executing the commit command for committing these changes:
The graphic below shows these commands executed on Git Bash which is followed by the $ ls command.

You can see that the $ ls command listed three files for the hello-git-branch while only two files for the master branch.
Creating a new branch on the remote server
After you feel comfortable with your code changes and want to commit the changes to the remote repository so all team members can see them, you may use the push command to commit the changes on the remote server.
In our case, we want to create a new branch on the remote server that we just created on the local repo.
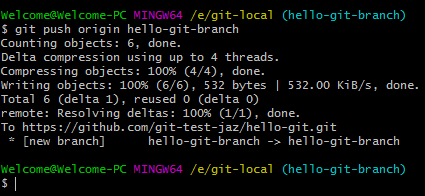
For creating the hello-git-branch branch on the remote server (or Github website), run this command on Git Bash:
The screenshot below shows how this command executed:
And if you look at the Github website account for this repo then it should show two branches as shown below:
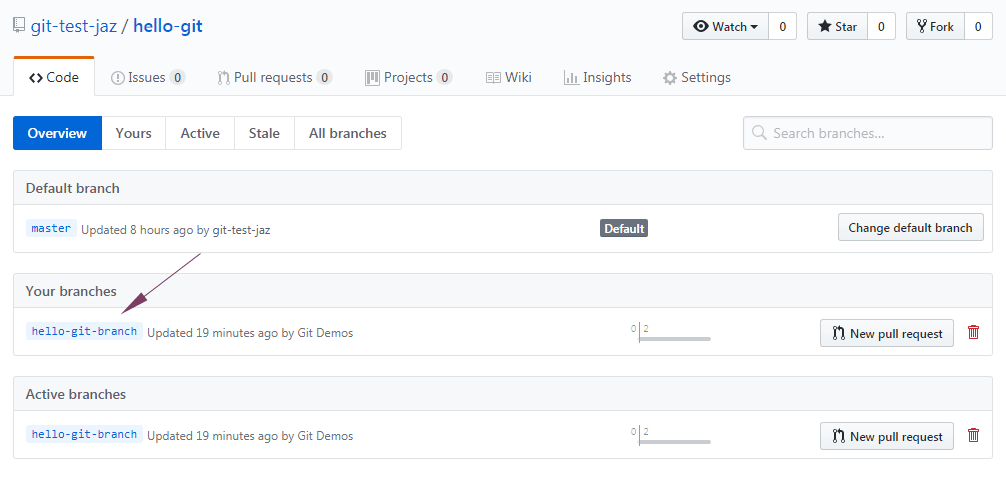
So, our remote repo also contains a newly created branch.