In this tutorial, I will explain how to add a new remote repository, a branch, and a file in the remote repository from the terminal (Git Bash).
Adding the remote repo
If you are working on Git terminal then you may check the current repo (if any is added/set) by using this command:
This should display the URL of the current remote repository as shown below for our test purpose:

If you require adding a new repository then use the git remote add command as follows:
For example, this command adds our test remote repository (bootstrap.git):
If Git terminal returns a fatal error message like this:
You may use some other name than the origin. For example:
For testing, if the remote repo is added or not, run the remote –v command again i.e.
The result of our test:
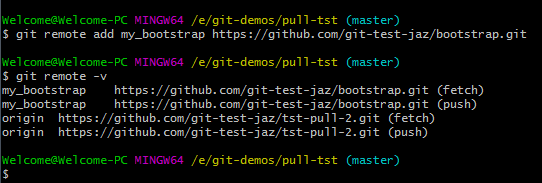
You can see the remote repo with the name of my_bootstrap is added.
How to add a branch while having multiple repositories?
In this section, I will show you how to add a branch in a remote repository while having multiple branches.
For that, first I added another repository by using this command:
So, we have now three repositories as shown below:
my_bootstrap    https://github.com/git-test-jaz/bootstrap.git (fetch)

my_bootstrap    https://github.com/git-test-jaz/bootstrap.git (push)

my_test https://github.com/git-test-jaz/hello-git.git (fetch)

my_test https://github.com/git-test-jaz/hello-git.git (push)

origin  https://github.com/git-test-jaz/tst-pull-2.git (fetch)

origin  https://github.com/git-test-jaz/tst-pull-2.git (push)
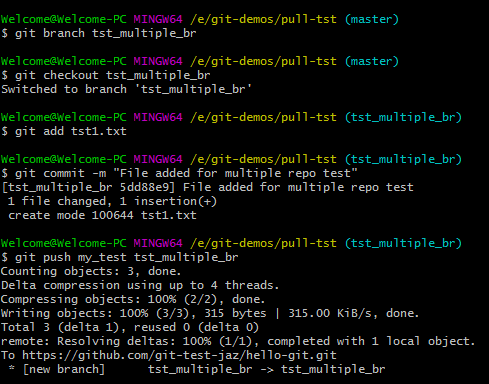
First, creating the branch locally:
This is followed by checking out this branch:
Now add the text file in that branch locally:
Committing the file added:
And finally push this branch and file in our target remote repository i.e. my_test
All these commands in the terminal with output:
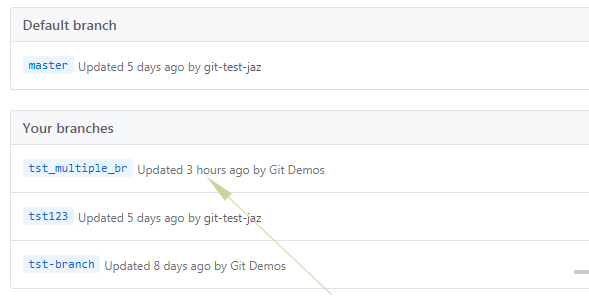
This is the online view of the remote repository after adding the branch/file: