What is label widget in tkinter
The tkinter is a Python library for creating GUI-based applications.
- The label is one of the available widgets in tkinter like buttons, entry, etc.
- Label widget is a box where you may place text or image.
- Generally, this is used as an information box explaining the purpose of another widget.
- For example, we have an entry widget (single-line textbox) in the form to enter name.
- To inform the users purpose of that entry widget, you may use a label beside the textbox.
The section below shows using the label widget with various available options.
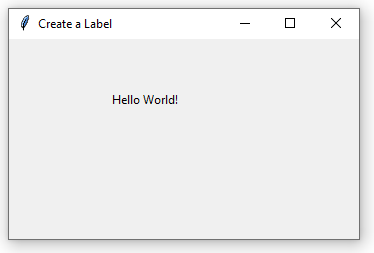
A simple label example
In this example, we created a window and placed a label in it. No other widget is created. Have a look:
Code:
#import tkinter library

from tkinter import *


#Create an instance of tkinter frame or window

win = Tk()


win.geometry("350x200")

win.title("Create a Label")


lbl1 = Label(win, text="Hello World!")

lbl1.place(x=100,y=50)


win.mainloop()
Output:
Creating labels with background and foreground colors
By using bg option, you may create a label with a background color. Similarly, the text color of the label can be set by the foreground color option i.e. fg.
See a program with a green background and white foreground color label below:
#import tkinter library

from tkinter import *

#Create an instance of tkinter window

win = Tk()


win.geometry("350x200")

win.title("Create a Label")


#Label with background and foreground color

lbl1 = Label(win, text="Hello World!", bg="green", fg="white")

lbl1.place(x=100,y=50)


win.mainloop()
Output:

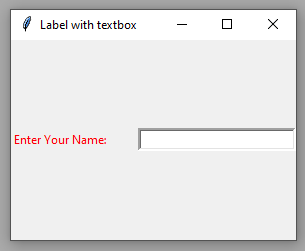
A label with a textbox/entry example
In the example below, we create a label along with a textbox/entry widget to show the purpose of the textbox.
Code:
from tkinter import *


win = Tk()

win.geometry("250x200")

win.title("Label with textbox")

#Label for textbox

Lbl = Label(win, text="Enter Your Name:", fg="red")

Lbl.pack( side = LEFT)


#Creating a textbox/entry

Ent = Entry(win, bd="3", width=25)

Ent.pack(side = RIGHT)

win.mainloop()
Output:
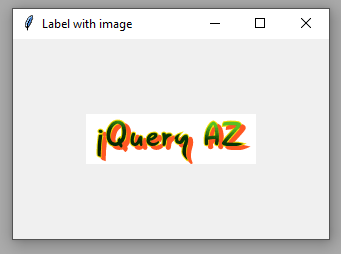
Using an image in label example
Rather than text, you may also use image in the label. For that, use the image option. First, have a look at an example below and then we will explain how it worked.
Code:
import tkinter as tk

from PIL import Image, ImageTk

win = tk.Tk()

win.geometry("250x200")

win.title("Label with image")


#Specify image path

img = ImageTk.PhotoImage(Image.open("E:/logo.png"))


#Create label and specify image there

lbl_img = tk.Label(win, image = img)

lbl_img.pack(side = "bottom", fill = "both", expand = "yes")


win.mainloop()
Output:
How did it work?
Step 1:
Consider this line:
from PIL import Image, ImageTk
We used Pillow Image Library to read and convert images to Python objects, so we can display them.
In order to install PIL, execute this command in the CMD (if you don’t already have):
pip install pillow
Step 2:
Then we specified the image in this line:
img = ImageTk.PhotoImage(Image.open(“E:/logo.png”))
Set the path according to your system.
Step 3:
Using image option in the label:
lbl_img = tk.Label(win, image = img)
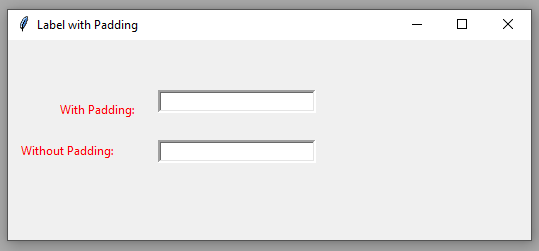
An example of padding options
You may add extra space to the left, right, top, and bottom of the text by using the padding options of the label widget.
For adding padding to the left and right of the text, use padx option.
To add space in the top and bottom, use the pady option.
Code:
from tkinter import *


win = Tk()

win.geometry("250x200")

win.title("Label with Padding")


#Label for textbox with padding

Lb_pd = Label(win, text="With Padding:", fg="red", padx = 40, pady=10).place(x = 10,y = 50)


#Creating a textbox/entry

Ent1 = Entry(win, bd="3", width=25).place(x = 150, y = 50)


#Label for textbox without padding

Lb_no_pd = Label(win, text="Without Padding:", fg="red").place(x = 10,y = 100)


#Creating a textbox/entry

Ent2 = Entry(win, bd="3", width=25).place(x = 150, y = 100)


win.mainloop()
Output:
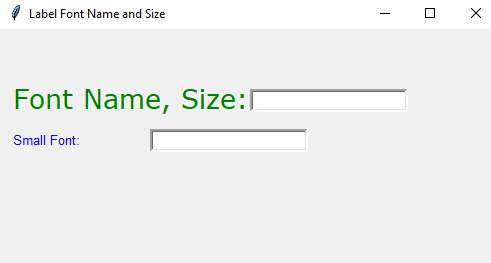
Changing the font size and name of the label example
In the example below, we created various-sized labels by using the font option of the label widget. Besides, font names are also given for two labels Verdana and Arial.
Code:
from tkinter import *


win = Tk()

win.geometry("350x300")

win.title("Label Font Name and Size")


#Label with bigger font

Lb_pd = Label(win, text="Font Name, Size:", fg="green", font=('Verdana', 20)).place(x = 10,y = 50)


#Creating a textbox/entry

Ent1 = Entry(win, bd="3", width=25).place(x = 250, y = 60)


#Label with bigger font

Lb_no_pd = Label(win, text="Small Font:", fg="blue",font=('arial', 10)).place(x = 10,y = 100)


#Creating a textbox/entry

Ent2 = Entry(win, bd="3", width=25).place(x = 150, y = 100)

win.mainloop()
Output: