
Python has built-in support for performing operations like writing in a file, reading, removing etc. I have written detailed tutorials covering these file operations:
Open, Read, write and appending – general overview
How to delete a file in Python
In this tutorial, I am specifically explaining how to write content to a text file using Python. Without importing any module, you may use the open() function and depending on the requirement for writing the content, you may specify the mode as mentioned below.
Modes for opening a file for writing new content
Just to remind, this is how open() function is used:
open(file, mode=’w’, buffering=-1, encoding=None, errors=None, newline=None)
In the mode argument, you may specify the writing option as follows:
- ‘w’: This value opens the file in write-only mode. Any existing content in the file is truncated and new given content is added. If the file already exists, it is over-written. If the specified file does not exist, it creates a new file.
- ‘a’: If you want to keep the existing content and add new content from the end of existing content, use the ‘a’ mode. The value ‘a’ appends the text in the specified text file.
- ‘w+’: For opening a file in read and write mode, use this value. Just like the ‘w’ value, the ‘w+’ also overwrites the file if it exists. If the file does not exist then creates a new file.
Note: You may also specify wb+, ab, ab+ for binary format. Since this tutorial is about writing in the text file so I am not covering these values for the mode parameter.
An example of Python write to file by ‘w’ value
In this example, first I opened the text file with ‘r’ argument value for mode i.e. opening the text file in read mode for showing the existing content.
This is followed by closing the file and reopening in the write mode by using the ‘w’ value. The write() function is used for adding new content to the specified text file.
Again, the file is opened by ‘r’ value and the content of the file is displayed:
# A demo of writing content to text file


ReadTxtFile = open("write-demo.txt", "r")

txtContent = ReadTxtFile.read();

print ("Existing Content : ", txtContent)


ReadTxtFile.close()


#File in write mode

WriteTxtFile = open("write-demo.txt", "w")

WriteTxtFile.write ("This is new text for the \n demo of writing in text file.")


WriteTxtFile.close()


#Reopeing file in read mode

ReadPostWrite = open("write-demo.txt", "r")

ContPostWrite = ReadPostWrite.read();

print ("After write() : ", ContPostWrite)


ReadPostWrite.close()
The output:
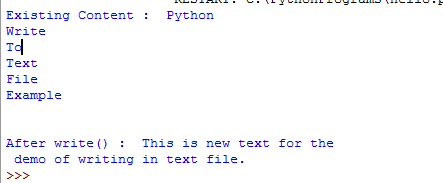
You can see, the existing content is truncated and new content is added.
The example of Python write to text file in append mode
So, you do not want to lose existing content and just require adding the new content in the text file. This is where the append mode will work.
For append mode, use the ‘a’ value for the mode argument. The example below demonstrates how:
# A demo of appending text


RTxtFile = open("write-append-demo.txt", "r")

txtCont = RTxtFile.read();

print ("Before Append - existing content : ", txtCont)


RTxtFile.close()


#File in append mode

AppendTxtFile = open("write-append-demo.txt", "a")

AppendTxtFile.write ("New text in append mode \n added to text file!")


AppendTxtFile.close()


#Reopeing file in read mode after append

ReasPostAppend = open("write-append-demo.txt", "r")

ContPostAppend = ReasPostAppend.read();

print ("After Append() : ", ContPostAppend)


ReasPostAppend.close()

You can see, the existing content remains in the text file while new content is added at the end of that specified file.
The example of ‘w+’ value with the ‘With’ statement
The ‘with’ keyword is a control flow structure that simplifies the error handling in Python. You may learn about the with keyword in its tutorial.
In this example, I used the ‘w+’ value for the mode argument; that allows reading and writing operations. The open function is used in the ‘with’ keyword that itself handles the file closing etc.
# A demo of w+ with 'With' keyword


with open('with-write-demo.txt', 'w+') as fileObject:

    txtFileCont = fileObject.read()

    print("Before writing: ", txtFileCont)

    fileObject.write('The new content added in the text file!')

    fileObject.seek(0)  #Move pointer at the beginning of text file

    txtFileCont = fileObject.read()

    print("After Writing: ", txtFileCont)
The output of above example:
Before writing:
After Writing: The new content added in the text file!
Note that, as ‘w+’ is for read and write to the file, the existing content of the file is truncated. If file does not exist, a new file is created and as the final call is made for reading the content, it displayed only what we wrote by write() function.
The seek(0) is used to move pointer at the beginning of the file, otherwise, an empty string is returned.
Using print function for writing in a file
Rather than displaying a line on the screen, you may also write to the file by specifying a file in the print function.
The following example shows writing a line to a text file using the print function:
# Writing by print function


with open('print-write.txt', 'w') as objFile:

    print('Writing a line by print function!', file=objFile)
Similarly, you may append the text by using the ‘a’ value for keeping existing content in the text file.
Writing a list to the text file by writelines() method
The writelines() method is used to write a sequence of strings to the file. So, you may use a list in the writelines() for writing its items in the text file.
# Writing by writelines function


fileObject = open("list-write-demo.txt", "w+")

lstStrings = ["Python ", "Hello ", "World!"]


line = fileObject.writelines( lstStrings )


fileObject.seek(0)  #Move pointer at the beginning of text file

txtFileCont = fileObject.read()

print("After Writing: ", txtFileCont)


# Close the file

fileObject.close()
The output:
After Writing: Python Hello World!