
Creating transition effect in HTML elements by jQuery
In this demo, you are going to see and learn how to create transition effect in two HTML elements with jQuery.
You may use the different type of content in the HTML elements like headings, text paragraphs, images etc. The plug-in allows using only two elements currently. Upon the user’s action like clicking the button, the second section appears with jQuery effect. You may use three different type of effects:
- Blinds
- Incremental blinds
- Sweep up
Have a look at the demo with different effects and options available in the following section. The plug-in name is elegant_transition that you may download here.
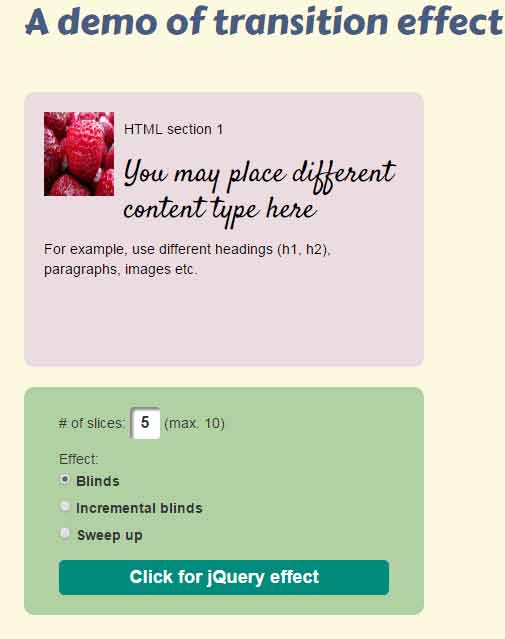
A demo of transition effect with blinds and other options
In the demo page, you can see the first section of HTML where transition effect will occur. In the second section, a few options are given along with “Click for jQuery effect” “button”. You may select “Blinds”, “Incremental blinds” and “Sweep Up” options from the radio group.
Besides, you may also select the number of slices with the maximum of 10 value. Have a look:

See online demo and code
The following markup is used in the example:
<div class="container">
<div class="row">
<div class="col-xs-12">
<h1>A demo of transition effect with jQuery</h1></div>
</div>
<div class="row">
<div class="col-xs-12 col-sm-8">
<div class="wrap" id="jquery-transition-demo">
<div class="box box1">
<div class="inner">
<img src="images/strawberries.jpg" width="70" height="84" align="left">
<h5>HTML section 1</h5>
<h2>You may place different content type here</h2>
<p>For example, use different headings (h1, h2), paragraphs, images etc.</p>
</div>

</div>
<div class="box box2">
<div class="inner">
<h2>HTML section 2</h2>
<p><strong>Again use different type of content here</strong> <img src="images/banana.jpg" width="77" height="117" align="right">Your content comes here. Your content comes here. Your content comes here. Your content comes here</p>
</div>
</div>
</div>
<div class="panels row">
<div class="col-xs-12">
<p># of slices:
<input type="text" id="slices" value="5"> (max. 10)</p>
<p>Effect:
<br>
<input type="radio" id="blinds" name="effect" value="blinds" checked>
<label for="blinds">Blinds</label>
<br>
<input type="radio" id="incblinds" name="effect" value="incblinds">
<label for="incblinds">Incremental blinds</label>
<br>
<input type="radio" id="sweep" name="effect" value="sweep">
<label for="sweep">Sweep up</label>
</p>
<div id="dash" class="trigger">Click for jQuery effect</div>
</div>
</div>


</div>
</div>
</div>
The script:
                <script>

                                $('#jquery-transition-demo').elegantTransition({

                                                speed: 500,

                                                effect: 'blinds',

                                                slices: 5

                                });

                </script>
In the script, you can see the speed option is set. You may set the speed in milliseconds. The number of slices is 5 while the effect used is “blinds”.
Also note that the respective values to be used for the Blinds, Incremental blinds and Sweep up effects are blinds, incblinds and sweep.