
- A range can be defined as the succession of values between the start, end, and step.
- In Kotlin, the ranges have the operator form .. (double dot).
- This operator (..) is complemented by in and !in.
- A Kotlin range can also be created by using the rangeTo() and downTo() function as well.
- The default value for the step is 1.
- By default, the values are inclusive for the given range. For example, a range of 1..5 means 1,2,3,4,5. That is, 1 and 5 are also included and the step value is 1.
- The section below shows using ranges of various types with .. and rangeTo() and downTo() functions.
Syntax of creating a range
The general way of creating a range in Kotlin is:
i in 1..10
for example:
for (i in 1..10){

//statement to execute here

}
This is equivalent of:
1 <= i && i <= 10
An example of creating a range
In this example, a simple range is created and used inside the for loop. The range starting value is 0 and end value is 5. See how we iterate through the range and display its items and also notice the step value, start and end inclusive values:
fun main(args: Array<String>) {

 //creating the range

    for (x in 0..5)

        println("$x ")


    }
The output:
0
1
2
3
4
5
The example of using rangeTo function
As mentioned earlier, you may also use rangeTo() and downTo() functions rather than .. (double dots). The example below creates a range and again used in the for loop to display its items. See how it is created with rangeTo() function:
fun main(args: Array<String>) {

 //creating the range with rangeTo()

    for (i in 6.rangeTo(10))

        println("$i ")


    }
The output:
6
7
8
9
10
The range example with downTo() function
The example below uses downTo() function in the range. In above two examples, the range goes upwards i.e. from 1….to 5 or 10. If you want to go downwards then you may use the downTo(). See the example below:
fun main(args: Array<String>) {

 //creating the range with downTo()

    for (x in 15 downTo 11)

        println("$x ")


    }
The result:
15
14
13
12
11
You can see, the count goes downwards from 15 to 11.
An example of creating a character range
Above, we seen the ranges of numbers in two different ways. In this example, a range of characters is created from ‘a’ to ‘i’ with the step of one by using the .. operator:
fun main(args: Array<String>) {

 //creating the character range

    for (charter in 'a'..'i')

        print("$charter ")

}
The result:
a b c d e f g h i
Using downTo() function for char range
See how we step down in the case of creating a char range:
fun main(args: Array<String>) {

 //creating the character range with downTo()

    for (x in 'i' downTo 'a')

        print("$x ")

 }
The output:
i h g f e d c b a
You saw, the range started from character ‘i’ and ended at ‘a’.
The example of step in number range
Now let us look at using the step() function as creating a range. As said earlier, the default step is 1; as we also seen in all above examples, whether going upwards or downwards.
By using the step() function, we will create a range with the gap of 5; see how:
fun main(args: Array<String>) {

    //creating the range with step

    for (x in 5..25 step 5)

        println("$x ")

 }
The output:
5
10
15
20
25
Using step with downTo function
The example below shows using the step() function with downTo(). I created a range from 100 to 1 with the gap of 20:
fun main(args: Array<String>) {

    //downTo() and step()

    for (x in 100 downTo 1 step 20)

        println("$x ")

 }
The output:
100
80
60
40
20
Using step() in char range example
Similarly, the step can be specified in the char range as follows:
fun main(args: Array<String>) {

    //char range with step()

    for (chr in 'a'..'i' step 2)

        print("$chr ")

}
Output:
a c e g i
Using step and downTo() with char range
Similarly, you may use the step function with the downTo() in the case of char range:
fun main(args: Array<String>) {

    for (chr in 'h' downTo 'b' step 2)

        print("$chr ")

}
The result:
h f d b
Excluding the end value by until() function
Until now, we have seen the ranges created with start and end values inclusive. Sometimes, you may require excluding the given end value in the range.
For that, you may use the until() function as shown in the code below:
fun main(args: Array<String>) {


    for (num in 1 until 5)

        println(num)

}
The output:
1
2
3
4
It can be seen that 5 is not displayed which is the end range value.
Range utility functions examples
In Kotlin, the range has a few simple utility functions that can be used for range simple tasks. For example, getting the minimum and maximum value in the range. Similarly, average value of the range, sum of range, total count of the items in range etc.
For that, Kotlin range has following functions:
- count()
- average()
- min()
- max()
- sum()
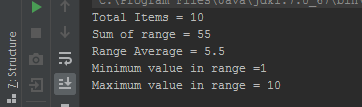
The example below creates a number range and then I used these functions to get the results:
fun main(args: Array<String>) {

//get minimum, maximum, count, sum and average


    val a_range = 1..10

    println("Total Items = "  +a_range.count())

    println("Sum of range = "  +a_range.sum())

    println("Range Average = "  +a_range.average())

    println("Minimum value in range = "  +a_range.min())

    println("Maximum value in range = " +a_range.max())

}
The result:
Using iterator function example
Finally, you may also iterate through a range by using iterator() function. For that, you may use the hasNext() and next() methods as follows:
fun main(args: Array<String>) {

//iterator function example


    val nums = (5..25 step 5)

    val i = nums.iterator()

    while (i.hasNext()) {

        val j = i.next()

        println(j)

    }

}
The output of the above code:
5
10
15
20
25