
Export HTML table to Excel spreadsheet with jQuery
In this tutorial, I am going to share an awesome plug-in for exporting the HTML table data to the Excel sheet with a click of a button.
The plug-in is based on jQuery which is lightweight, only 3Kb of the JS file. You need to include the plug-in JS file in the <head> section, after the reference of jQuery JS file. Simply refer to the table ID or class in the jQuery code that you want to export to the excel spreadsheet with a few options and you are done.
A demo of jQuery HTML table to Excel export
For the demo, I am creating a table that is based on Bootstrap classes to simplify the process. You may use any table, even without any CSS that you want to export.
The table contains the <th> tags that define the headings for the table of HTML. The same headers act as the headings in the Excel sheet after export. A few options may also be set like tab name in the Excel sheet, the file name of Excel, etc in the jQuery code that I will explain after the demo.
For this demo, the Excel export file will download as the demo page loads. The next demo shows downloading the file as the button is clicked, have a look:
See online demo and code
The markup of the table:
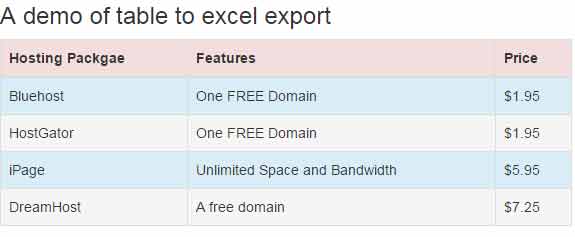
    <div class="container">

    <h3>A demo of table to excel export</h3>

                                <table class="table table-bordered table-striped table-hover" id="demo-export">

      <thead>

        <tr  class="danger">

          <th>Hosting Packgae</th>

          <th>Features</th>

          <th>Price</th>

        </tr>

      </thead>

      <tbody>

        <tr class="info">

          <td>Bluehost</td>

          <td>One FREE Domain</td>

          <td>$1.95</td>

        </tr>

        <tr class="active">

          <td>HostGator</td>

          <td>One FREE Domain</td>

          <td>$1.95</td>

        </tr>

        <tr class="info">

          <td>iPage</td>

          <td>Unlimited Space and Bandwidth</td>

          <td>$5.95</td>

        </tr>

        <tr class="active">

          <td>DreamHost</td>

          <td>A free domain</td>

          <td>$7.25</td>

        </tr>


      </tbody>

    </table>
The simple script with only two options that specify the file and tab names:
<script>

                $(function() {

                   $("#demo-export").table2excel({

                   filename: "tab2exl",

                   name: "Hosting Packages"
              });
            });
</script>
In this example, the export of HTML table is linked with the button. As you click the button “Export table data to excel”, the excel file will download on the user’s computer.
Also, you may specify certain rows not to be exported to the excel file. For that, simply use the exclude option in the jQuery code where you will specify the class/ID of the row that you want to omit.
See this example where I have used the exclude for the last row in the table. The table contains four rows as you see in the output below. After downloading the Excel file, open it and you can see it contains only three rows:

Complete code:
<!DOCTYPE html>
<html>
<head>
		<script src="https://ajax.googleapis.com/ajax/libs/jquery/2.0.0/jquery.min.js"></script>
        <link rel="stylesheet" href="https://netdna.bootstrapcdn.com/bootstrap/3.3.0/css/bootstrap.min.css">
		<script src="js/table2excel/jquery.table2excel.js"></script>
</head>
<body>
    <div class="container">
    <h3>A demo of table to excel export</h3>
	<button class="btn btn-primary btn-lg">Export table data to excel</button></div><br />
    <table class="table table-bordered table-striped table-hover" id="demo-export">
      <thead>
        <tr  class="danger">
          <th>Hosting Packgae</th>
          <th>Features</th>
          <th>Price</th>
        </tr>
      </thead>
      <tbody>
        <tr class="info">
          <td>Bluehost</td>
          <td>One FREE Domain</td>
          <td>$1.95</td>
        </tr>
        <tr class="active">
          <td>HostGator</td>
          <td>One FREE Domain</td>
          <td>$1.95</td>
        </tr>
        <tr class="info">
          <td>iPage</td>
          <td>Unlimited Space and Bandwidth</td>
          <td>$5.95</td>
        </tr>
        <tr class="active dntinclude">
          <td>DreamHost</td>
          <td>A free domain</td>
          <td>$7.25</td>
        </tr>

      </tbody>
    </table>
<script>
	$(function() {
	   $("button").click(function(){
		$("#demo-export").table2excel({
            filename: "tab2exl",
			name: "Hosting Packages",
			fileext: ".xls",
			exclude_img: true,
			exclude_links: true,
            exclude: ".dntinclude",
			exclude_inputs: true
		});
         });
	});
</script>
</body>
</html>
Setting up table to Excel export plug-in
The process is quite simple.
- Download the plug-in from the Github website or you may get the JS file from the demo page after “view source” the code and locate the jquery.table2excel.js file. Save it at your system and place at the desired location where you intend to refer it in the <head> section e.g.:
<script src=”js/table2excel/jquery.table2excel.js”></script>
- As, I have used Bootstrap based table, its reference is also given in the <head> section. You may use a simple HTML table even without any CSS, borders, etc.
- Not to mention, the jQuery library is included before the reference of plug-in’s JS file.
- The above two demos show how to use the options and markup for exporting the table.