
How to create links in HTML
The <a> tag, that stands for the “anchor” is used to create the hyperlinks in HTML documents.
This is how a simple link can be created by using the anchor tag:
<a href=”http://www.link.com”>Anchor text</a>
Where:
- href: Stands for “Hypertext REFerence” which is used to specify the target page or section of the current page.
You may use relative or absolute paths in the href attribute, for example:
<a href=”folder_name/info.html”>Anchor text</a>
- The text between the opening <a> and closing </a> tag is the text to be displayed to the visitors.
- You may also use images in place of text to link the target URL.
In the following section, I will explain with demos that how you may create links in HTML with different attributes and style with CSS. The demos can be seen online while code is also available to copy that you may execute in your local system.
A simple example of creating a link
In this example, a simple link with only href attribute and anchor text is created. See the demo online:
![]()
See online demo and code
This is how link tag is used in the example:
<a href="https://www.jquery-az.com/">Tutorials and Tips</a>
This link will open in the same window or tab where it is clicked.
Opening link in new window or tab by target attribute
By using the target attribute and using the _blank value, the link will be opened in a new tab or window. See the example online:
![]()
See online demo and code
This is how the link is created with _blank value:
<a href="https://www.jquery-az.com/" target="_blank">Tutorials and Tips</a>
The other values can be used are:
- _self
- _top
- _parent
Styling links of HTML by using CSS
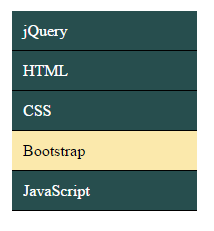
Let me move ahead by using the power of CSS to style simple looking links of HTML. The first demo is the links in a menu. The menu is created by using a <div>, <ul>, <li> and <a> tags.
The CSS class for the hyperlinks is created in the <style> section. See the demo online which is followed by a little description.

See online demo and code
You can see the CSS properties for the <a> tag is set in a class:
.men_ex{

border-radius:5px;

}

.men_ex ul {

width:185px;

list-style-type: none;

}

.men_ex ul li a{

text-decoration: none;

color: #fff;

padding: 10.5px 11px;

background-color: #274E4E;

display:block;

border-bottom:solid 1px #000;

}
As such, the <a> tag is inside a <div> –> <ul>–> and <li>, this is referenced accordingly in the CSS class.
In this example, the menu remains the same as mouse hovers over the link. To add hovering effect with CSS, see the following example.
Adding hover style in links of HTML
The hover state occurs as mouse is brought over a link. You may specify different properties like text, background and many others at hover state purely by using CSS.
See this example where I added hover effect in the above menu example:
See online demo and code
You see, the background-color and text color are changed as you bring mouse over any menu item. The following code is added in the <style> section:
.men_ex ul li a:hover, .men_ex ul li .current {

color: #000;

background-color: #FBE9AC;

}
That is, I specified the hover selector, a:hover to get that.
Using title attribute in a link
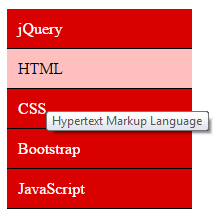
The title attribute of the <a> HTML tag is generally used to describe a little about the link, apart from the hyper text. The title appears as a tooltip as you bring mouse over a link (by default).
By using specific plug-ins, the look of these tooltips can be enhanced incredibly. Let me first show you simply using the title attribute in above example – where I created a menu.
See online demo and code
You see, all links are given the title attribute:
<div class="men_ex" id="mainmenu">

<ul>

<li><a href="#" title="jQuery is a JavaScript library">jQuery</a></li>

<li><a href="#" title="Hypertext Markup Language">HTML</a></li>

<li><a href="#" title="Cascade Stylesheet">CSS</a></li>

<li><a href="#" title="Mobile-first Bootstrap Framework">Bootstrap</a></li>

<li><a href="#" title="A poerful client side language">JavaScript</a></li>

</ul>

</div>
Bring the mouse over any link to display the title as tooltip.
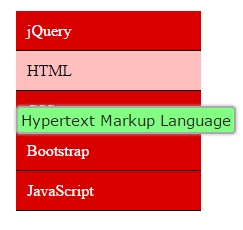
An example of using the jQuery plug-in to show enhanced tooltips in hyperlinks
See the following example where I used a jQuery plug-in for changing the default style of title attribute of <a> tag. Open the demo page and bring the mouse over any link to display a tooltip. I will explain this after that:
See online demo and code
You can see, the same menu is used to display link. Nothing is changed in the markup part including titles.
To create these tooltips, you have to include the jQuery and jQuery-ui libraries. Besides, for making tooltips appear smoothly, you can use the jquery-ui.css. All these files are included in the <head> part of demo page:
<link rel=”stylesheet” href=”//code.jquery.com/ui/1.11.2/themes/smoothness/jquery-ui.css”>
<script src=”//code.jquery.com/jquery-1.10.2.js”></script>
<script src=”//code.jquery.com/ui/1.11.2/jquery-ui.js”></script>
The next step is to initiate the plug-in in the <script> section:
<script>

$(function() {

$( document ).tooltip({

tooltipClass: "uitooltip"

});

});

</script>
Create/modify the class for displaying the tooltips as you want.
You should use this type of tooltip only if already using jQuery / jQuery-ui in your project or maybe try to find out some light-weight and link title specific plug-in.
Using the rel attribute in links of HTML
Another important <a> tag attribute is “rel” that stands for relevance. This attribute is specific to search engines to tell them the relevance of that link to the current web page.
The default value of rel = follow. That means the target link should get some link juice or power for SEO (in eyes of Google or may be other search engines)
The other value is “nofollow” which means you are not offering any link juice or endorsing the target link.
For example:
<a href=”http://www.google.com/” rel="nofollow" >A leading Search engine</a>
There are other values as well that you may use in the “rel” attribute:
- alternate: May be used for the print version of that document etc.
- search: It can be used to link search tool to the document
Using image as link rather text
As mentioned earlier, you may also images that are linked to the target pages. To make an image a link, simply use the <img> tag in place of anchor text. See the following demo:

See online demo and code
This is how the image link was created in the above example:
<a href="https://www.jquery-az.com/jquery-tips/" target="_blank"><img src="jquery.jpg"></a>