
The Bootstrap markdown editor
As you work with Bootstrap framework, chances are you may need your users providing a text editor with certain features like heading options, typical italic, bold options, and that also enables uploading the images.
As such, the Bootstrap is relatively a new web framework. In spite of many built-in features, many are still not available. Thanks to hard-working developers who are working to add more and more features by way of plug-ins that for other developers is the matter of adding a few line of codes.
One such plug-in is Bootstrap-markdown-editor, which is based at jQuery and is developed by Ignacio de Tomás. This jQuery based Bootstrap plug-in is available at GitHub website.
In this tutorial, I will try to explain with demos how easy it is to install or integrate in your current web project. Along the way, I will also explain how to set up this plug-in (the files required in the <head> or <body> sections).
A demo of using Bootstrap editor
Basically, the plug-in uses a textarea of HTML, which is assigned an id. The ID is used in the jQuery code that will play its role in making this simple textarea to an editor with useful features.
First, have a look at a demo online which is followed by steps of making this Bootstrap editor:
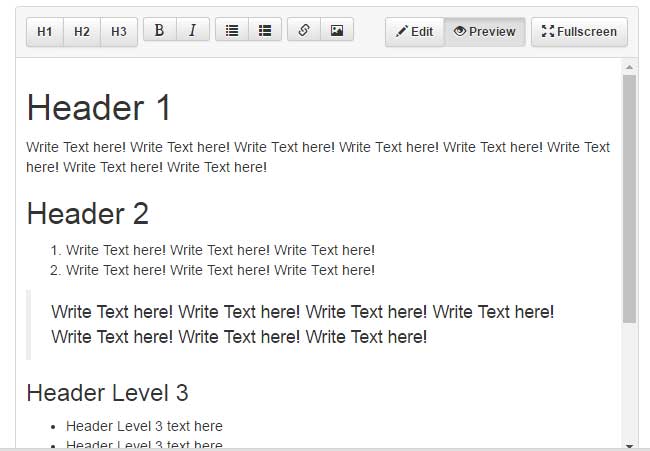
See online demo and code (by view source)
This is how the text editor is created:
First of all, include the CSS files of bootstrap, bootstrap-theme.min.css, and bootstrap-markdown-editor.css in the head section.
See these CDN and local link:
<link href=”//maxcdn.bootstrapcdn.com/bootstrap/3.3.1/css/bootstrap.min.css” rel=”stylesheet”>
<link href=”//maxcdn.bootstrapcdn.com/bootstrap/3.3.1/css/bootstrap-theme.min.css” rel=”stylesheet”>
<link href=”css/bootstrap-markdown-editor.css” rel=”stylesheet”>
In the markup section, use the <textarea> tag with an id which is referred in the <script> section, for example:
<textarea name="text" id="editor">
Just above the </body> tag, place the script files including plug-in, jQuery, bootstrap and marked.min.js:
<script src=”//cdnjs.cloudflare.com/ajax/libs/jquery/2.1.3/jquery.min.js”></script>
<script src=”//maxcdn.bootstrapcdn.com/bootstrap/3.3.1/js/bootstrap.min.js”></script>
<script src=”//cdnjs.cloudflare.com/ajax/libs/ace/1.1.3/ace.js”></script>
<script src=”//cdnjs.cloudflare.com/ajax/libs/marked/0.3.2/marked.min.js”></script>
In the source code, you can also see a script for calling and setting up the editor.
How to enable file uploads as using this plug-in
As mentioned earlier, this Bootstrap text editor also supports images uploading. You have to use certain options and also ensure server side settings in order to make it work.
To enable file/image uploading use this code in the <script> section, e.g.
<script>


jQuery(document).ready(function($) {


$('#editor').markdownEditor({

preview: true,

imageUpload: true, // Activate the option

uploadPath: 'upload.php',

onPreview: function (content, callback) {

callback( marked(content) );

}

});


});


</script>
Have a look at this online demo and notice the difference between the first and this example where you can see “Image upload” option at the right most in toolbar:
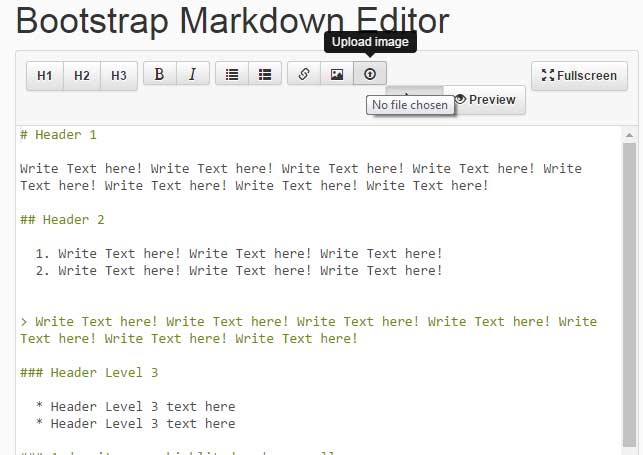
See online demo and code
You can see, the only difference in code is the addition of upload option in the script part. The uploadPath specifies where files should be saved in server side.
After a user selects the file and uploads it, you have to manage it in scripting to get the file and save in the specified location.