
The step wizard plug-in
The SmartWizard is a cool plug-in for creating the step by step process for different purposes like checkout, account creation with validation, etc.
The plug-in is based on jQuery with the support of Bootstrap framework. In the following section, you may see the demos and how to set up SmartWizard plug-in on your website.
A demo with default wizard
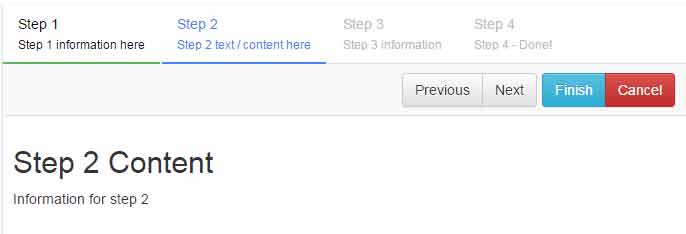
In this demo, the simple content is displayed in a default view. You may use circles and arrows as well for showing the steps of the process.
Above the content with the steps wizard and at the bottom, you may see the buttons for proceeding to next steps, have a look:
Online demo and code
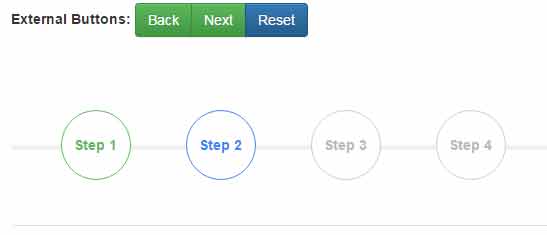
An example of using the circles to show steps
Using the content as in the above example except the circles are used for showing the steps. Besides, different Bootstrap buttons are used than in the above demo. See the demo and code below:
The markup for this example:
    <div class="container">


        <form class="form-inline">

            <label>External Buttons:</label>

            <div class="btn-group navbar-btn" role="group">

                <button class="btn btn-success" id="prev-btn" type="button">Back</button>

                <button class="btn btn-success" id="next-btn" type="button">Next</button>

                <button class="btn btn-primary" id="reset-btn" type="button">Reset</button>

            </div>

        </form>


        <br /><br /><br />


        <!-- SmartWizard html -->

        <div id="smartwizard">

            <ul>

                <li><a href="#step-1">Step 1</a></li>

                <li><a href="#step-2">Step 2</a></li>

                <li><a href="#step-3">Step 3</a></li>

                <li><a href="#step-4">Step 4</a></li>

            </ul>


            <div>

                <div id="step-1" class="">

                    <h2>The content for step 1</h2>

                    Write content here for step 1.

                </div>

                <div id="step-2" class="">

                    <h2>Step 2 Content</h2>

                    <div>Information for step 2</div>

                </div>

                <div id="step-3" class="">

                      You may use a form as well!

                </div>

                <div id="step-4" class="">

                    <h2>Step 4 Content</h2>

                    <div class="panel panel-default">

                        <div class="panel-heading">My Details</div>

                        <table class="table">

                            <tbody>

                                <tr> <th>Name:</th> <td>Your Name</td> </tr>

                                <tr> <th>Email:</th> <td>abc@example.com</td> </tr>

                            </tbody>

                        </table>

                    </div>

                </div>

            </div>

        </div>


    </div>
The script:
   <!-- Include SmartWizard JavaScript source -->

    <script type="text/javascript" src="js/smartWizard/jquery.smartWizard.min.js"></script>


   <script type="text/javascript">

        $(document).ready(function(){

            // Smart Wizard

            $('#smartwizard').smartWizard({

                    selected: 0,

                    theme: 'circles',

                    transitionEffect:'slide',

                    toolbarSettings: {toolbarPosition: 'both',

                                      toolbarExtraButtons: [

                                            {label: 'Finish', css: 'btn-success', onClick: function(){ alert('Finish Clicked'); }},

                                            {label: 'Cancel', css: 'btn-warning', onClick: function(){ $('#smartwizard').smartWizard("reset"); }}

                                        ]

                                    }

                 });


            // External Button Events

            $("#reset-btn").on("click", function() {

                // Reset wizard

                $('#smartwizard').smartWizard("reset");

                return true;

            });


            $("#prev-btn").on("click", function() {

                // Navigate previous

                $('#smartwizard').smartWizard("prev");

                return true;

            });


            $("#next-btn").on("click", function() {

                // Navigate next

                $('#smartwizard').smartWizard("next");

                return true;

            });


                $('#smartwizard').smartWizard("theme", "circles");


        });

    </script>
You may get the complete code including the dependent JS/CSS files like jQuery, Bootstrap, and plug-in files from the demo page.
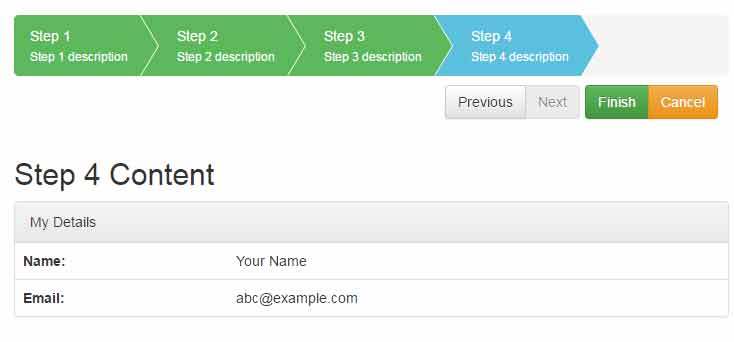
A demo of wizard with arrows
You may also use the arrows option provided in the plug-in. For that, simply change the theme option in JS code and include the CSS file of the circle that comes with the plug-in package (download link below).
Have a look at the arrows theme wizard:
A demo with form fields with validation
You may also create a form in steps as using this nice plug-in. See this demo where a form is divided into four steps and fields are validated in each step. Try by entering the email, name etc. fields and press next button:

How to set up this Bootstrap wizard plug-in?
As you can see in the demo pages, you have to include the jQuery, Bootstrap, and plug-in JS and CSS files in appropriate places. If you want to use the circles or arrows themes then use the respective CSS file.
You may download the plug-in package from the Github website here.
You may also grab the required files from the demo page by “View source” the code.