
The offbeatSlider plug-in for creating slideshows
The simple and light-weight (6Kb) plug-in (offbeatSlider) can be used for creating the slideshows or carousels in your web pages.
You may create the slideshows of images or only text that can be navigated by using the arrows or dots. By using the simple options in the jQuery code, the slides can move automatically and may act as the carousel for the page header.
The usage is quite easy as explained below.
Demo1 Demo2 Demo3 Demo4
Developer’s page Download plug-in
How to install the offbeatSlider plug-in?
Download the plug-in from the above link and include the offbeat-slider.js file after jQuery library:
<script src=”https://code.jquery.com/jquery-1.12.0.min.js”></script>
<script src=”js/jquery-offbeat-slider/offbeat-slider.js”></script>
Also include the offbeat-slider.css in the <head> section of the webpage.
<link rel=”stylesheet” href=”css/jquery-offbeat-slider/offbeat-slider.css”>
For the markup, create the container where you intend to place the slideshow containing images, arrows and dots markup:
<div class="ofp-slider" data-slider-index="1"> <img class="ofp-slides" src="images/images1.jpg"> <img class="ofp-slides" src=" images/image2.jpg"> <img class="ofp-slides" src=" images/image3.jpg"> <img class="ofp-slides" src=" images/image4.jpg"> <div class="ofp-slider-navigation ofp-center ofp-middle"> <div class="ofp-arrow-left">❮</div> <div class="ofp-arrow-right">❯</div> </div> <div class="ofp-slider-navigation ofp-bottom-middle"> <span class="ofp-slider-dots"></span> <span class="ofp-slider-dots"></span> <span class="ofp-slider-dots"></span> </div> </div>
Initiate the plug-in with default or available options:
$(“.ofp-slider”).offbeatSlider({“slideStartIndex”: 2, “carousel”: true});
See the demos below with different options.
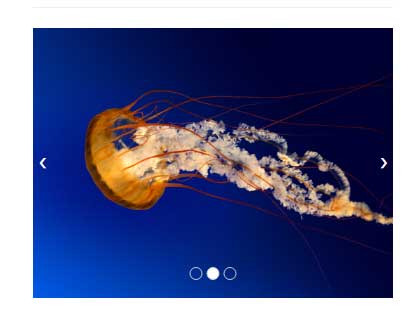
A demo of slideshow with default options
In this example of explaining the offbeatSlider slideshow plug-in, three images are used. The slides can be navigated by using the arrows or dots that are placed on the bottom. The carousel option is kept false, that means it will not be automatic:
See online demo and code
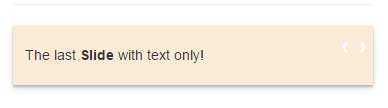
A demo with text and image slideshow
You may also create a slideshow with text-only or text and images mixed. For that, simply create a container like div for the text with text CSS class for styling it. Provide the text and see how it looks:
See online demo and code
Customize it as you need.
The markup for this demo:
<div class="ofp-slider" data-slider-index="1"> <div class="ofp-slides ofp-slides-text"> And you may use text only in a slide </div> <img class="ofp-slides" src="img/slide-image1.jpg"> <img class="ofp-slides" src="img/slide-image2.jpg"> <div class="ofp-slides ofp-slides-text"> The last <strong>Slide</strong> with text only! </div> <div class="ofp-slider-navigation ofp-top-right"> <div class="ofp-arrow-left">❰</div> <div class="ofp-arrow-right">❱</div> </div> </div>
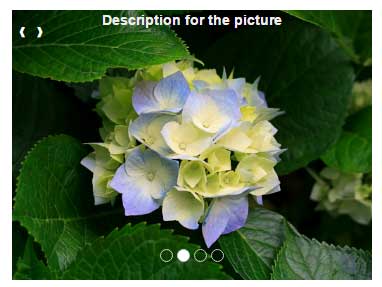
A demo with image description in slides
You may also add the description or caption with each image in the slideshow. For doing this, you simply add a paragraph tag with the required text, style it with inline or external CSS. Place the <p> tag for the specific slide after its image reference as shown in this demo:
See online demo and code
Also, notice the arrow placement for this demo. In the first demo, it was in the middle of left and right while in this demo, both arrows are placed towards the left top corner.
Create the image carousel example
If you want to make the slideshow work like a carousel (slides moving automatically) then simply set the carousel option as true in the jQuery code.
Using almost the same example as above except slides are moving automatically by using the true value for carousel option:
See online demo and code
The script for this example:
$(".ofp-slider").offbeatSlider({"slideStartIndex": 1, "carousel": true});
Using the animate, duration, easing and carousel options
In this example, all options are used for the slideshow. The animate option as true will make the slide move with blurry animation.
The easing option has two possibilities. The default value is linear.
The duration option sets the time interval between two slides.
The slideStartIndex index is already used in above examples as the data attribute. This option enables you to set the first slide to be displayed as web page loads. The value starts from 1. See this demo with all these options:
See online demo and code
The script:
$(".ofp-slider").offbeatSlider({

   animate: true,

   duration: 700,

   slideStartIndex: 3,

   easing: "linear", //easein, linear, ...

   carousel: true


});
For learning how you may customize the arrows and dots placement, visit the developer’s page.