
The datepickk plugin – A JavaScript date picker
If you need to work with dates in your web projects and need a JavaScript based solution, there are plenty of plug-ins available.
Although, you may use jQuery UI datepicker if a jQuery library is included in the web page. A tutorial is written with examples in this website.
Similarly, if you are working with Bootstrap framework and need to work with dates, it has no built-in component for that. However, you may use third-party date plug-in; a guide is written here.
In this tutorial, I am going to show you a cool datepicker plug-in, which is also based in JavaScript with plenty of options. The plug-in name is datepickk and is available to download at GitHub website.
Let me start by showing the live demos with code and at the later part, you can see the setup guide to use this plug-in.
In this example, the calendar or date picker is visible as you click on the button. The calendar will show current month/date. See the demo and code by clicking the links below:
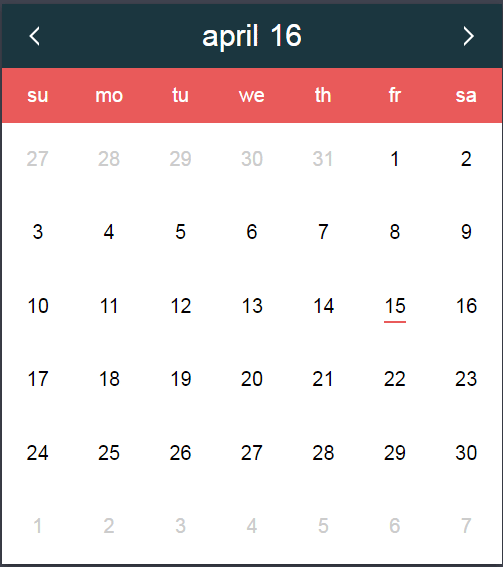
See online demo and code
In the code section, you can see how simple it is after including the libraries of the datepickk plug-in. Clicking on the button will open the modal view of the calendar with the current date highlighted.
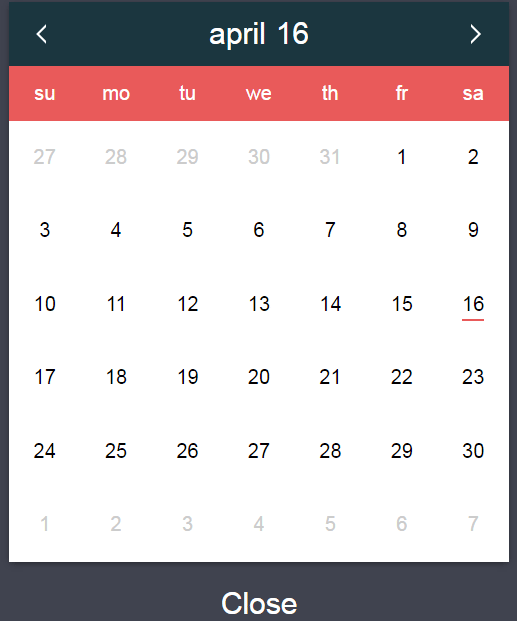
A demo of closing date picker on select
In above example, the date picker remains opened after selecting a date from the calendar. In this example, the calendar will be closed after selecting a date in the calendar.
First, click the button to open the datepicker and then select a date:
See online demo and code
Steps for creating datepicker that closes on select:
First of all, create a new Datepickk object:
<script>

var datepicker = new Datepickk();

</script>
After that, call the function closeOnSelectDemo at the click event of button:
<button class="btncls" onclick="closeOnSelectDemo()">Click to open date picker</button>
And this is the JS function:
<script>

function closeOnSelectDemo(){

datepicker.unselectAll();

datepicker.closeOnSelect = true;

console.log(datepicker.closeOnSelect);

datepicker.onClose = function(){

datepicker.closeOnSelect = false;

datepicker.onClose = null;

}

datepicker.show();

}

</script>
A demo of closing date picker on click
Rather than closing the date picker after just selecting a date, you may enable the users to first select a date and then click on “Close” button in the calendar to close the calendar. See the following demonstration with code:
See online demo and code
You can change the text “Close me” to your choice by changing in the <script> part. e.g.
datepicker.button = ‘Close’;
You can see the complete code at the demo page.
An example of showing selected value in a textbox field
In above examples, the calendar is shown and date is selected by different ways like closing the calendar upon date selection or clicking it. Apparently, the demos are incomplete without showing the selected value in an element like textbox or <p>, <div>, or span element etc.
In this example, I have used a text box ahead of a button for showing the selected date. As you select a date, the selected date will be visible in the textbox:

See online demo and code
Following is the JS function used for displaying calendar and selected date in the textbox.
<script>

function closeOnClickDemo(){

datepicker.unselectAll();

datepicker.closeOnClick = false;

datepicker.button = 'Close';

datepicker.onSelect = function(checked){

document.getElementById("datedemo").value = this.toLocaleDateString();

};

datepicker.onClose = function(){

datepicker.closeOnClick = true;

datepicker.button = null;

datepicker.onClose = null;

}

datepicker.show();

}


</script>
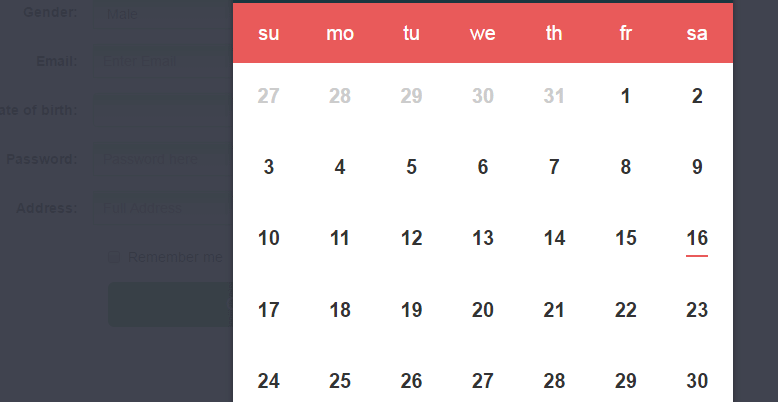
A demo of using this calendar with Bootstrap classes
In this example, a textbox is created with a date icon ahead. As you click the icon, the calendar will open and selected date will be shown in the textbox. The icon is placed inside the <span> tag. So, at the click event of span, the JS function is called:
![]()
See online demo and code
This is how the function is written to open the datepickk plug-in:
<div class='col-lg-9'>

<div class="form-group">

<label for="dtpickerdemo" class="col-sm-2 control-label">Select date</label>

<div class='col-sm-4 input-group date' id='dtpickerdemo'>

<input type='text' class="form-control" id="seldate"/ >

<span class="input-group-addon" >

<span class="glyphicon glyphicon-calendar" onclick="closeOnSelectDemo()"></span>

</span>

</div>

</div>

</div>
The JS function is the same as in close on select example, except the selected date is shown in the textbox field.
See the complete code on the demo page.
A demo of using in the Bootstrap form
In this demo, I am using a full demo form (sign-up) to demonstrate the JavaScript date plug-in. The date of birth field is using the icon just like in above example. The form fields are assigned custom CSS classes as well.
As you click the icon, the calendar will open in a modal view:
See online demo and code
Get the complete code in the demo page.
Other options in datepickk plug-in
This date JavaScript plug-in has many other options, for instance, showing the specific start date, max date, minimum date. You may display the calendar in a locked state as well, so users are unable to select a date.
It also has an option to display calendar inline or in specified container like a <div> element.
To see the complete list, visit the plug-in page here and click on the demo and docs link.
Setting up datepicker plug-in
To use this plug-in at your website, simply include the datepickk.min.css and datepickk.min.js files. You can find these files in the downloaded package’s dist folder.
<link rel=”stylesheet” href=”dist/datepickk.min.css”>
<script src=”dist/datepickk.min.js”></script>
Place these files at the desired location and refer these files in <body> section.