
Purpose of CSS padding and margin properties
- The padding property of CSS is used to add the space or gap between the content and border of the specified HTML element.
- The margin property is used to add space or gap between different HTML elements.
- The difference between the padding and margin can be understood by this figure.
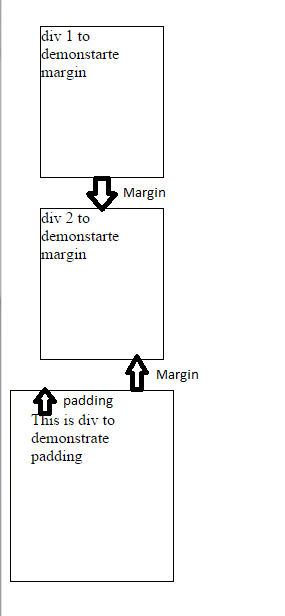
So we have three div elements. The first two are with margin properties and the third is with padding property.
The distance or space between the div elements is the margin while the space between the text inside the third div and its border line is padding.
In this tutorial, I will show you examples of using the padding and margin properties with different HTML elements.
Syntax of CSS margin and padding
The syntax to use CSS margin property by single declaration:
margin: 50px;
This will set the space for all directions i.e. top, bottom, left and right. If you need to set the margin differently for all directions, this can be done as follows by single declaration or shorthand:
Where:
- 10px is for the top
- 20px for the right
- 30px is for the bottom
- 40px for the left
You may also set the margin by using each direction separately, as follows:
margin-top: 10px;

margin-right: 20px;

margin-bottom: 30px;

margin-left: 40px;
Syntax of padding CSS property
Just like the margin property, the padding property can be set by using the single declaration or shorthand way or by using each direction’s padding property separately.
By single declaration with one value:
padding: 50px;
For each direction in a single declaration:
padding: 10px 20px 50px 100px;
The padding order is the same as in the margin property if you use four values.
For each direction separately:
padding-top: 10px;

padding-right: 20px;

padding-bottom: 30px;

padding-left: 40px;
An example to set padding and margin in an HTML list
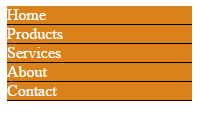
In the introductory part, I have shown the padding and margin properties used in the div element. In this demo, a list is created with menu items that are basically links. The list is inside a div element. The list contains menu items in the form of hyperlinks.
The list is styled with other CSS properties, however, the output without using the CSS padding and margin properties is as shown below:
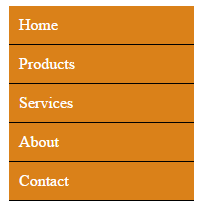
By adding the padding of 10px for the links inside the <ul>:
The look will be:
HTML and CSS
<!DOCTYPE html>
<html>
<head>
<style>
.demo1 ul {
    width:185px;
    list-style-type: none;
}
.demo1 ul li a {
    padding: 10px;
    text-decoration: none;
    color: #fff;
    background-color: #DA8119;
    display:block;
    border-bottom:solid 1px #000;
}


</style>
</head>

<body>
<div class="demo1">
<ul>
<li><a href="#">Home</a></li>
<li><a href="#">Products</a></li>
<li><a href="#">Services</a></li>
<li><a href="#">About</a></li>
<li><a href="#">Contact</a></li>
</ul>
</div>

</body>
</html>
You can see, the padding added space between the content and border of each link.
Just add the margin of 2 px in the link class and the look will be:
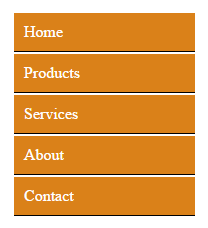
The whole class for links inside the <ul> element is:
padding: 10px;

margin: 2px;

text-decoration: none;

color: #fff;

background-color: #DA8119;

display:block;

border-bottom:solid 1px #000;
A padding demo with an HTML table
The following is a demonstration of padding CSS property in an HTML table.
For that, I have created a table with a few rows. The table is styled by different CSS properties. Before showing what it looks like with the padding property, look at it without using the padding in table data <td>.
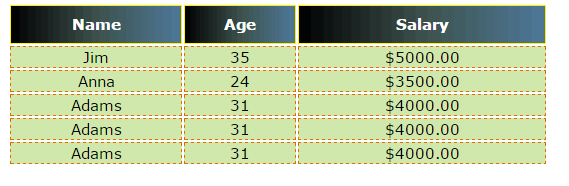
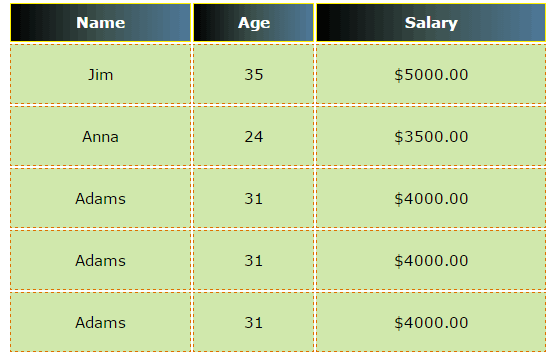
By adding the padding to the table data class, the table will look as shown below:
HTML and CSS:
<!DOCTYPE html>
<html>
<head>
<style>
.table_bg {
  width:40%;
  font-family:verdana;
  font-size:15px;
  color:#fff;
  text-align:center;
}
.table_bg th{
    border: solid 1px #fff000;
    background: linear-gradient(to right, #000000, #3C514D, #4E7898);
    color: #fff;
    line-height:35px;
  }
.table_bg td{
    padding: 20px;
    border: dashed 1px #DF7000;
    background: #D0E8AC;
    color: #000;
  }
</style>
</head>
<body>
<table class="table_bg">
    <tr>
     <th>Name</th>
     <th>Age</th>
     <th>Salary</th>
    </tr>
    <tr>
     <td>Jim</td>
     <td>35</td>
     <td>$5000.00</td>
    </tr>
    <tr>
     <td>Anna</td>
     <td>24</td>
     <td>$3500.00</td>
    </tr>
    <tr>
     <td>Adams</td>
     <td>31</td>
     <td>$4000.00</td>
    </tr>
    <tr>
     <td>Adams</td>
     <td>31</td>
     <td>$4000.00</td>
    </tr>
    <tr>
     <td>Adams</td>
     <td>31</td>
     <td>$4000.00</td>
    </tr>
</table>
</body>
</html>
This is the style code that is used for the <td>:
padding: 20px;

border: dashed 1px #DF7000;

background: #D0E8AC;

color: #000;
An example of margin and padding with form elements
You can also use padding and margin properties in form elements like text boxes, textarea, dropdowns, buttons, etc.
Using the padding property in textbox means adding space between the cursor inside the textbox and its border. The margin will add space between different textboxes or other form elements.
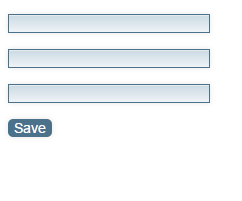
To make it clearer, let me design a form and show you the difference with and without using the padding and margin properties.
The initial outlook of the form without using the padding and margin properties is as shown below:
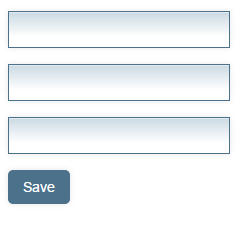
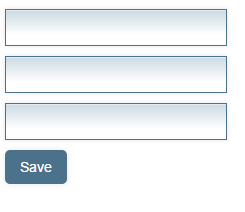
By adding the padding to the input class for textboxes and btn class for submit button, the form look will be as follows:
The padding for textboxes:
padding: 10px;
The padding in button:
padding: 9px 15px;
Code:
<!DOCTYPE html>
<html>
<head>

<style>
input{
    padding: 10px;
    border: solid 1px #4B718B;
    outline: 0;
    width: 200px;
    background: -webkit-gradient(linear, left top, left 25, from(#FFFFFF), color-stop(4%, #CDDBE4), to(#FFFFFF));
    background: -moz-linear-gradient(top, #FFFFFF, #CDDBE4 1px, #FFFFFF 25px);
    box-shadow: rgba(0,0,0, 0.1) 0px 0px 8px;
    -moz-box-shadow: rgba(0,0,0, 0.1) 0px 0px 8px;
    -webkit-box-shadow: rgba(0,0,0, 0.1) 0px 0px 8px;

    }

.btn input {
    width: auto;
    padding: 9px 15px;
    background: #4B718B;
    border: 1px;
    font-size: 14px;
    color: #FFFFFF;
    -moz-border-radius: 5px;
    -webkit-border-radius: 5px;
    }
</style>

</head>
<body>

<p>
  <input type="text"/>
</p>
<p>
  <input type="text"/>
</p>
<p>
  <input type="text"/>
</p>
<p>
  <!--Place text area here-->
</p>
<p class="btn">
        <input type="submit" value="Save" />
</p>

</body>
</html>
To increase or decrease the space between the textboxes, you can use the margin CSS property there. For the demo, I used a negative value to decrease the distance in the input class.
margin: -3px;
The output will be as follows:
You can see, the gap between textboxes is reduced by 3px after using the negative value in the CSS margin property.
You can also see, by using the padding property the distance between the cursor inside the textbox and border line is increased which is styled with other CSS properties to make it look much better.
The “Save” submit button is also given the padding property:
padding: 9px 15px;
which is used to align text in all directions.