
The image upload plug-in
If you require enabling your visitors to upload image files through web forms and before uploading the image, preview it then img-upload plug-in can be the right choice.
The bootstrap-imageupload is a jQuery based plug-in that is implemented with Bootstrap framework. You may also use it independently if your website is not Bootstrap based.
The JS file size is only 12 Kb while its minified version is 5Kb size.
To set up this preview image before uploading plug-in, follow these steps.
Step 1:
Simply download the image upload preview plug-in from the Github website here (Credit: egonolieux). (No more available)
Note: You may also get the JS and CSS files from the demo page code section (view source to download files on your system).
Step 2:
Refer to the JS file (bootstrap-imageupload.js) after the reference of the jQuery library.
Step 3:
Use the markup as shown in the demo below.
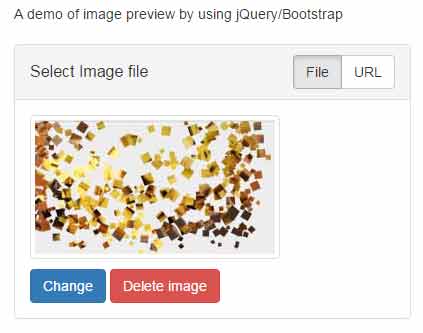
A demo of image previewing by using jQuery
As the demo page loads, you can see a few buttons. First of all, you may choose a file from your system by choosing the “File” option. This is the default selection.
You may also use the URL option by clicking that button. After entering the URL, press the submit button and image will be loaded in the preview area.
Once loaded, you may remove or change the image by using the respective buttons. Have a look at the demo by clicking the image or link below:
Online demo and code
The markup used for this example:
        <div class="container">


            <p>A demo of image preview by using jQuery/Bootstrap</p>


            <!-- bootstrap-imageupload. -->

            <div class="imageupload panel panel-default">

                <div class="panel-heading clearfix">

                    <h3 class="panel-title pull-left">Select Image file</h3>

                    <div class="btn-group pull-right">

                        <button type="button" class="btn btn-default active">File</button>

                        <button type="button" class="btn btn-default">URL</button>

                    </div>

                </div>

                <div class="file-tab panel-body">

                    <label class="btn btn-primary btn-file">

                        <span>Browse</span>

                        <!-- The file is stored here. -->

                        <input type="file" name="image-file">

                    </label>

                    <button type="button" class="btn btn-danger">Delete image</button>

                </div>

                <div class="url-tab panel-body">

                    <div class="input-group">

                        <input type="text" class="form-control hasclear" placeholder="Image URL">

                        <div class="input-group-btn">

                            <button type="button" class="btn btn-default">Submit</button>

                        </div>

                    </div>

                    <button type="button" class="btn btn-default">Remove</button>

                    <!-- The URL is stored here. -->

                    <input type="hidden" name="image-url">

                </div>

            </div>


        </div>
The simple script:
        <script>

            var $imageupload = $('.imageupload');

            $imageupload.imageupload();


        </script>
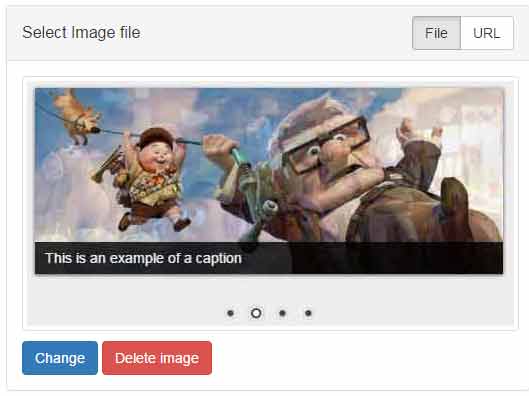
A demo of using the height and width options
In the above demo, you might notice the size of the selected image is small. You may adjust the size as per desire by using the maxWidth and maxHeight options in the jQuery code.
You may also specify the maximum size of the image by maxFileSizeKb option.
Have a look at this code where I used these options:
Complete code for this example
<!doctype html>
<html>
<head>
        <link href="https://maxcdn.bootstrapcdn.com/bootstrap/3.3.7/css/bootstrap.min.css" rel="stylesheet" integrity="sha384-BVYiiSIFeK1dGmJRAkycuHAHRg32OmUcww7on3RYdg4Va+PmSTsz/K68vbdEjh4u" crossorigin="anonymous">
        <link href="css/bootstrap-imageupload/bootstrap-imageupload.css" rel="stylesheet">

        <style>
            body {
                padding-top: 70px;
            }

            .imageupload {
                margin: 20px 0;
            }
        </style>
</head>

<body>
        <div class="container">

            <p>A demo of image preview by using jQuery/Bootstrap</p>

            <!-- bootstrap-imageupload. -->
            <div class="imageupload panel panel-default">
                <div class="panel-heading clearfix">
                    <h3 class="panel-title pull-left">Select Image file</h3>
                    <div class="btn-group pull-right">
                        <button type="button" class="btn btn-default active">File</button>
                        <button type="button" class="btn btn-default">URL</button>
                    </div>
                </div>
                <div class="file-tab panel-body">
                    <label class="btn btn-primary btn-file">
                        <span>Browse</span>
                        <!-- The file is stored here. -->
                        <input type="file" name="image-file">
                    </label>
                    <button type="button" class="btn btn-danger">Delete image</button>
                </div>
                <div class="url-tab panel-body">
                    <div class="input-group">
                        <input type="text" class="form-control hasclear" placeholder="Image URL">
                        <div class="input-group-btn">
                            <button type="button" class="btn btn-default">Submit</button>
                        </div>
                    </div>
                    <button type="button" class="btn btn-default">Remove</button>
                    <!-- The URL is stored here. -->
                    <input type="hidden" name="image-url">
                </div>
            </div>

        </div>

        <script src="https://code.jquery.com/jquery-1.12.4.min.js" integrity="sha256-ZosEbRLbNQzLpnKIkEdrPv7lOy9C27hHQ+Xp8a4MxAQ="crossorigin="anonymous"></script>
        <script src="https://maxcdn.bootstrapcdn.com/bootstrap/3.3.7/js/bootstrap.min.js" integrity="sha384-Tc5IQib027qvyjSMfHjOMaLkfuWVxZxUPnCJA7l2mCWNIpG9mGCD8wGNIcPD7Txa" crossorigin="anonymous"></script>
        <script src="js/bootstrap-imageupload/bootstrap-imageupload.js"></script>

        <script>
            var $imageupload = $('.imageupload');
            $imageupload.imageupload({
                maxWidth: 500,
                maxHeight: 500,
                maxFileSizeKb: 3048
            });

        </script>
</body>
</html>
Notice the settings in the <script> section.
Finally, you may also restrict the image file formats by using the allowedFormats option with an array of values like .jpg, .png, etc.